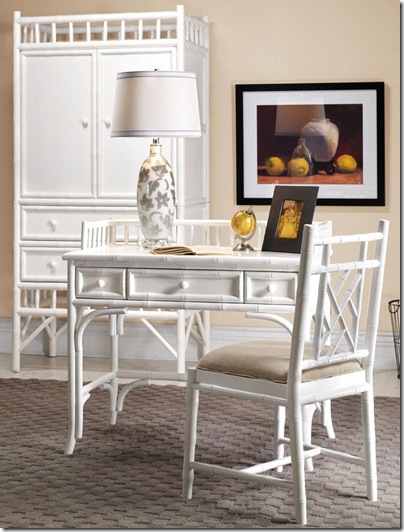
I wasn’t ready to throw down $399 for the desk and another $199 for the chair, so I sought out some other options. And what did I find at my local Goodwill for $8?
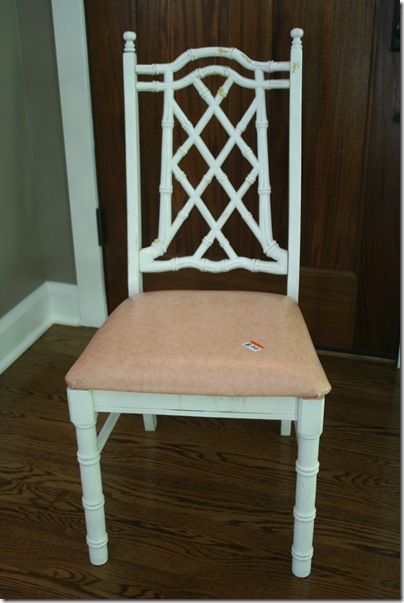
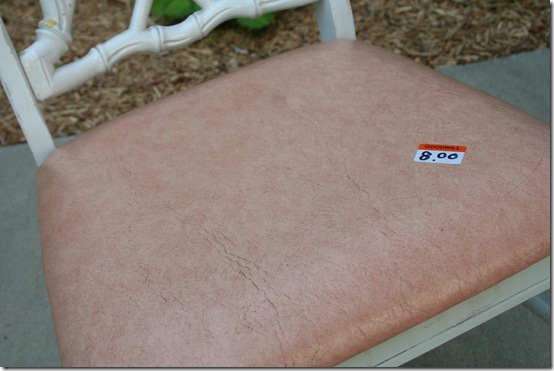
It has a very similar look to the Julia Chair, but up close it was a bit worse for wear. It doesn’t look so scary in the photo above, but you can see below that the white paint was chipping off all over, and the peach-colored vinyl seat cover, as well as the rest of the chair, had dirt in every crevice.

The first step in the transformation was to remove the seat by unscrewing it from the bottom. I discovered that the ugly vinyl wasn’t the original seat fabric.
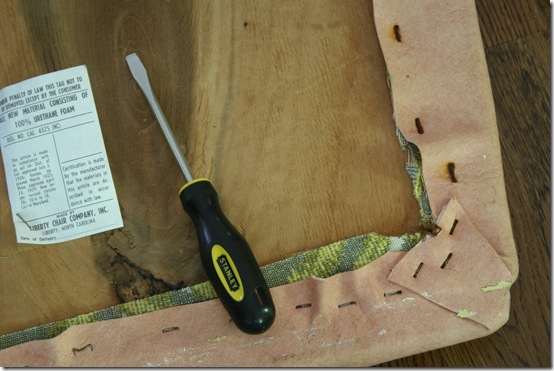
Removing staples does not require too much skill, but it’s a pain. It wouldn’t have been so bad except that these staples were old and rusty, so they broke easily when I tried to pry them out with my flat head screwdriver. I ended up having to yank out many staple parts with pliers. And the rusty staples and icky fabrics gave me the eebie-jeebies.
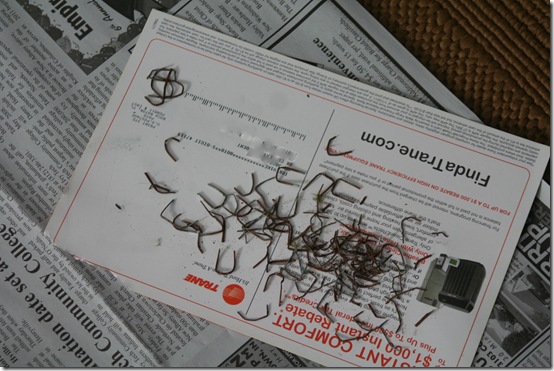
Once I removed all the staples, I got to see the original seat fabric, which was a bamboo pattern. It actually wasn’t so bad, although the colors certainly aren’t me, and it was dirty and musty-smelling.
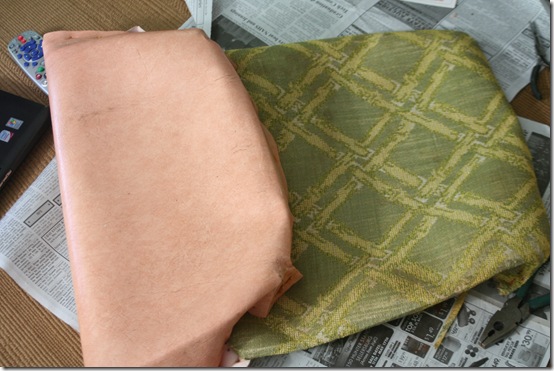
The next step was to give the whole chair a good scrub down. Unfortunately the faux bamboo material has lots of grooves, so between that and the criss-cross pattern with all the inside corners, the cleaning process took a while. Next I tried to sand off as much of the chipping white paint as I could. The chair was originally some kind of yellowish color, which must have coordinated with the yellow on the original seat fabric. Because of the chair design, everything had to be hand sanded. Good times.
After sanding, I gave the chair 2-3 coats of Kilz primer, doing a light sanding between each coat. It was tricky to get good coverage on the intricate seat back. Once the primer was dry, I did another light sanding and then used my spray gun for the turquoise paint. I put on several light coats, with a light sanding between each coat. I let the final coat dry for over 24 hours, then used my spray gun again for several coats of Minwax Polycrilic in a satin finish.
Meanwhile, I also had to recover the seat, which had been removed at the beginning of the process. I found a turquoise and brown trellis fabric at Jo-Ann. I would have liked to have reused the old foam cushion because was perfectly shaped for the seat, with contoured edges and even cutouts on one edge for where the seat meets the back of the chair. But it was so old, and had the original fabric’s design etched, in what I can only assume is dirt, on the top of the cushion. It, too, gave me the eebie-jeebies.
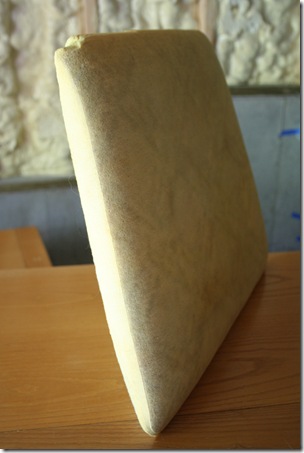
Instead I purchased a new 2-inch foam cushion at Jo-Ann and cut it down to fit the dimensions of the chair. I even created a bit of a contour around the edges, just cutting off the top corners with scissors. Sorry, no photo of that glamorous trim job. I placed the new cushion on top of the wooden seat, then wrapped batting around it and stapled the batting to the underside of the seat. After that, I wrapped the fabric around the batting and stapled it securely around the bottom of the seat also. The only tricky part about the fabric stapling was trying to keep it as taut as I could, while keeping the trellis pattern consistent on each side. With a geometric print, things can get wonky really fast if you’re just pulling and stapling, because you have to keep everything lined up.
Finally it was time to marry the chair and the seat together. I simply screwed the seat back in from the underside using the original four screws that I had safely tucked away during the makeover. Here’s the finished product:
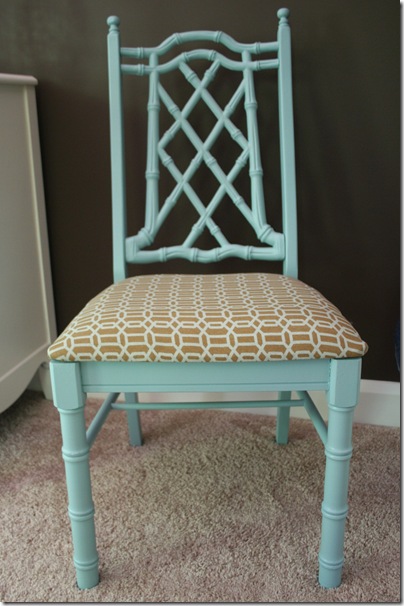
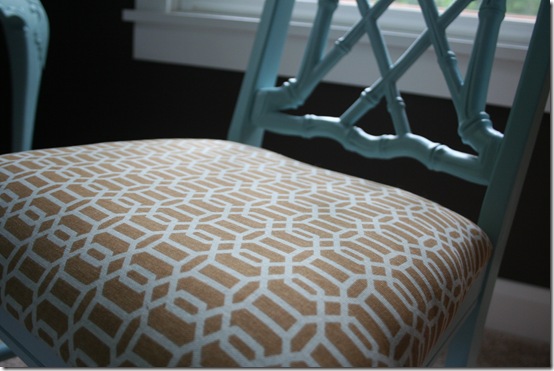
A chair makeover usually is no biggie, but here were the trickiest parts of my job:
- Getting the grime out of all the nooks and crannies
- Sanding the multiple layers of peeling paint by hand
- Getting the primer, paint and poly into all the corners and nooks and crannies on the bamboo grid. I had to spray right-side up, upside down, and from all sides. The hardest part was getting to all the hidden parts while trying not to get too much spray on the easily-accessible parts, which causes drips.
- Getting the rusty old staples out of the bottom of the seat
- Keeping the geometric pattern lined up all around the seat as I kept it taut while stapling
Hollie
Linking to:
LOVE that chair! the color and fabric are sooo pretty and suit the chair perfectly!
ReplySo cute! I have been scouring Craigslist for a faux bamboo chair for my home. You did a beautiful job on this one. I love your color combination for the paint and fabric.
ReplyWhat a great match to your inspiration picture! Love how it turned out, and I think you are quite brave (and very talented) with the geometrics. Mine would never have stayed straight! Lovely!
ReplyDeb
Gross! I hate old fabric too! She looks great now! That turquoise is perfect and the fabric looks great with it!!
ReplyThis comment has been removed by a blog administrator.
ReplyWow, that's fabulous! I love the idea of a desk instead of a nightstand and I've been eyeing up a bit of bamboo for my home as well.
ReplyGoing to definitely have to keep my eye out for a bargain like this, eebie-jeebies and all, it came out wonderful!
It came out tres chic my dear. :) Love the bargain and then the after...hmm...when are you going to have classes on spraying furniture? :)
ReplyCheers~
e
Great minds think alike.......I have the same fabric on a chair don't you just love it? I will have to keep my eyes open for bamboo chairs their so stylish. Your newest follower stop by for a blog visit :)
ReplyI love how it turned out!
ReplyI WANT a bamboo chair SOOOO bad! I love what you did with it!
ReplyThe made-over chair is adorable! Love it! I like and can relate to your blog (I procrastinate too) - I'm definitely following along :)
Replywow what a great chair! nice find! and the color you chose looks fabulous.
ReplyLove it, love it, LOVE it! Did I mention I love it? Gorgeous!
ReplyI love it! And, I love the word "wonky". I've been using it a lot lately, and it makes people think that I'm wonky!!! Great job!
ReplyLooks FAB! Following you :)
ReplyTurned out amazing! Worth all that work for sure. Would love to have you link this up to my {wow me} wednesday link up party going on right now over on my blog. :) {New follower, too. What a cute blog.}
ReplyGinger
gingersnapcrafts.blogspot.com
Wow! Just bought a set of 4 of these chairs with a table at an estate sale today. Original yellow painted finish and bamboo fabric still intact. I was looking for color ideas for the redo. Thanks for posting!
ReplyI WISH that I could get a chair like that at an affordable price! Good find and nice restoration. Thanks for the tip on geometric patterned fabric......... I'll stick to the ones that i don't have to line up 'cos I could just imagine how mine would turn out. I'm a little impatient with the staple gun. lol!
ReplyLove the way this turned out!
ReplyOne common variety of outdoor bamboo chairs are folding chairs. These chairs work well on porches, patios, grassy areas, by the pool and in many other outdoor locations.
ReplyThat chair looks fabulous and now I am hooked to your site. You do great work and I can't believe that you made that $8.00 second hand store find look like a million bucks. Great work Hollie!!!
ReplyOh my goodness... BEAUTIFUL!!! I have been looking for a chair similar to this to refinish for my new office....
ReplyOh my goodness... BEAUTIFUL!!! I have been looking for a chair similar to this to refinish for my new office....
ReplyWow. Such vision. I have hard time seeing "junk" and thinking I can turn it into something beautiful. My confidence is building though.... Thanks to inspiration like that!
ReplyJaime