I’ve been wanting to take another photography class, and heard good things from a blogger about the online classes offered by Nicole Hill Gerulat. While checking out Nicole’s online class info, I came across her book, called “Photo 101.” Reviewers said it actually taught them how to use their camera, unlike their user manuals, which used complicated words and didn't tell them much more than what the buttons were called. I decided to start out with the book rather than an online class, partly because it’s less than half the price of the classes, and partly because I had limited time before vacation and I needed to get my photography groove on.

|
| Book photo via Nicole's Classes website |
I received the book in the mail just before we left for vacation, so I wasn’t able to do any reading and practicing beforehand. Instead, I read it on the plane and during the car ride from Seattle (where we flew in to from Louisville) to Vancouver on our first day of vacation. The way you’re initially supposed to use the book is to have your camera in front of you to study and tinker with as you read along, then when you finish a chapter, you practice what you learned. Since I had read it on a plane and in a car, I didn’t have my camera in front of me, so I was trying to remember everything I had read while we were out taking photos, without the chance to try things out first. It took me a few days to get it all figured out, after fiddling with the camera and referring back to the book several times. I can’t say I’m an expert by any means, but I’m certainly on my way to more successful photos and am enjoying the manual settings.

|
| Excerpt from Photo 101 by Nicole Hill Gerulat, via Nicole's Classes website |
I give the book a rave review! If you’re struggling to get good photos out of your DSLR, or are considering purchasing and DSLR and want to know more about what you’d be getting into, I highly recommend Nicole’s book. She explains all the technical jargon in layman’s terms and provides lots of photo examples. Before this book, I didn’t know what white balance, ISO or metering were used for, nor how they could improve the quality of my photos dramatically! And I had forgotten why it’s important to be able to choose your own aperture (also called f-stop) and shutter speed, rather than letting the camera decide what your desired photo outcome should be.
What I took away from the book the most:
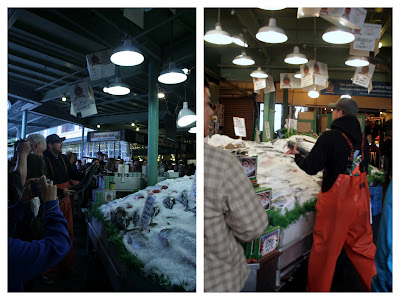
- To change the white balance based on the lighting I’m in (daylight, cloudy, shade, inside tungsten, inside fluorescent, etc.). Adjusting the white balance helps you get a natural looking photo rather than a photo with too much yellow or blue.
|
| Photo on the left is with daylight white balance (obviously too blue to be natural); photo on the right is white balanced for tungsten lights. |
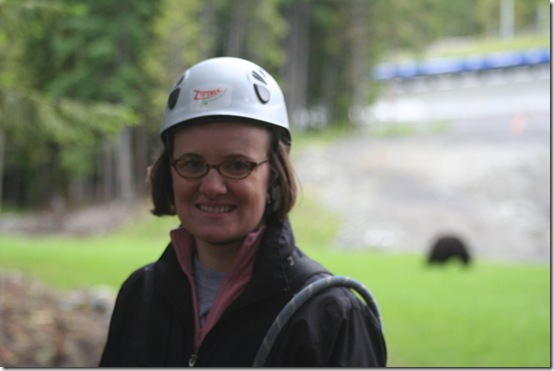
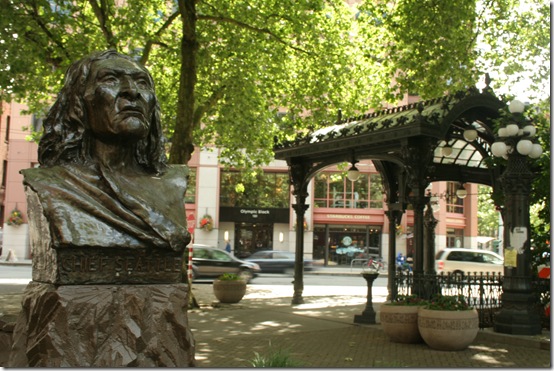
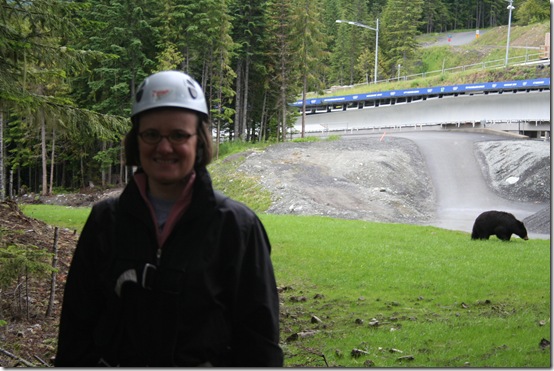
- To keep objects both near and far in focus when they’re on different planes, use a narrow aperture (large number). To keep only objects in the same plane in focus, use a wide aperture (small number). (Thanks Nicole for correcting my terminology. Luckily I understood what I was doing, but mistakenly thought that narrow = small and wide = large. This is why manual settings are confusing to most people!)
|
| That blob behind my left shoulder is a black bear. It would have been nice to actually see it! |
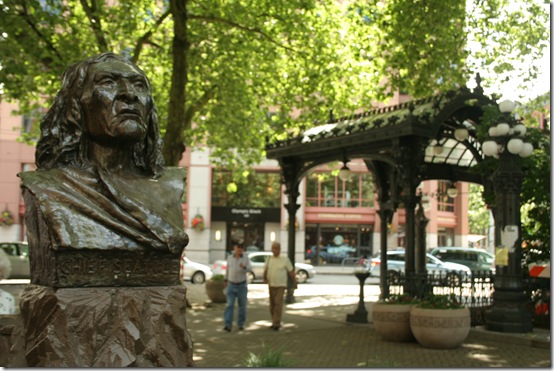 |
| Taken with an aperture of 5.6. The statue in the foreground is in focus, but the rest of the scene is slightly blurred. |
|
| Taken with an aperture of 10. The statue is still in focus, but now the background is more in focus as well. |
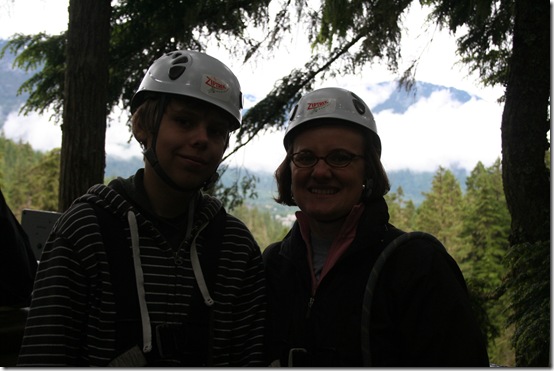
- If you are tired of having your subject in the dark when you’ve got a light background (this happens a lot when you’re photographing people against a background that includes the sky), change the metering mode so the camera meters the light off the subject only, rather than the subject and background together.
|
| You know you have photos like this! It happens a lot in beach photos too. Unfortunately I don't have a different, better, version to show you, but I'm sure you get the idea. |
Are these terms new to you, or are you a manual settings user yourself? If you're intrigued but afraid, I highly recommend going for it! Until I get the hang of all the settings, I've been capturing several shots of the same thing when possible, making minor tweaks each time. Once I download the photos to my computer where I can see them larger than 1" by 1.5", I decide which version looks best and delete the rest. Isn't the digital age wonderful?
If you haven't already seen them, you can check out some of the skyline photos I took in Seattle by checking out yesterday's post.
Hollie

I should read this book, I'm pathetic right now with my camera. Then if somehow I could magically understand Adobe photoshop.....
ReplyDeleteThank you so much for the book review --that is so nice of you and I'm so glad it worked for you. Shooting manually is a VERY powerful thing!
ReplyJust a quick note correcting some thoughts above. Where you say: "To keep objects both near and far in focus when they’re on different planes, use a wide aperture. To keep only objects in the same plane in focus, use a narrow aperture." --it's actually opposite! Use a wide aperture (small umber) for shallow depth of field and small (narrow) aperture for deep depth of field.
Thanks again for the shout out!
@Twice Nice Nicole has books and classes about Photoshop too!
Reply@nicole hill gerulat You are most welcome for the shout-out. Thanks so much for correcting my terms. It seems odd that wide would equal a smaller number, and vice versa, but I remember now that you pointed it out. Luckily I was using the numbers and not the wide/narrow terms when I was using my camera!
Reply