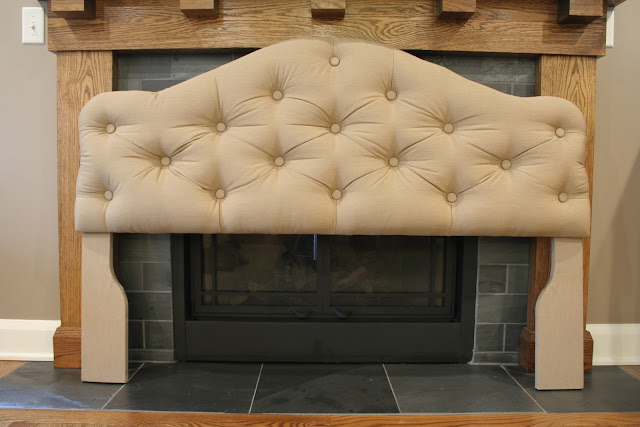
Last time I showed you the diamond-tufted headboard I made for my mom. Today I'll give you the step-by-step tutorial. If I can do it, you can too!
Materials:
- Piece of wood or MDF cut to the shape of the headboard (or wooden headboard to cover)
- 2" foam large enough to cover the headboard
- Spray adhesive
- Button cover kits
- Hi-loft batting - enough to cover headboard and foam, with a few inches extra on all sides
- Fabric - enough to cover headboard, foam and batting, with several inches extra on all sides, plus enough to make buttons
- Scissors
- Upholstery needle - long enough to go through the thickness of the wood, foam, batting and fabric
- Staple gun and plenty of staples
- Upholstery thread or something as strong (I used jewelry thread I had on hand, until it ran out)
- Drill with 1/4" drill bit
- Pencil
- Marker
- Measuring tape
- Paring knife and/or X-ACTO knife
- Pliers - to remove a rogue staple if needed
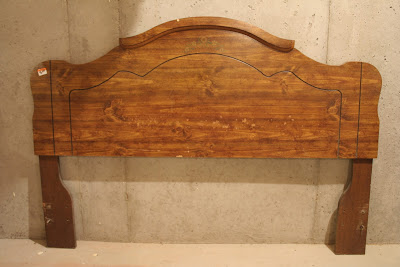
I had assumed I would buy some MDF at the hardware store, and cut it into a fun shape with a jigsaw. But what did I find on a quick stop by my local Goodwill? A perfectly shaped queen-size faux-wood headboard, just screaming to be upcycled.
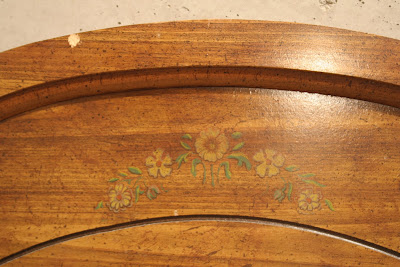
Do you see the ugly faux-wood finish and the awful decorative flowers on the front? How very '70s.
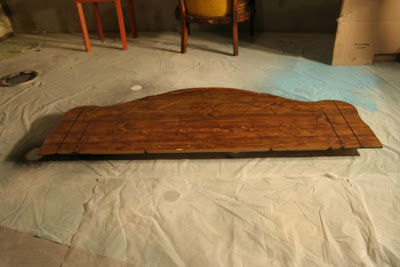
The first thing I did was remove the molding across the top middle of the headboard, so it would be flat rather than three-dimensional. Then I removed the legs and stored them.
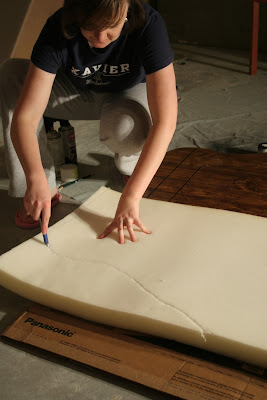
Next I spread my foam out on the ground and sat the headboard on top of it. I traced around the headboard shape onto the foam.
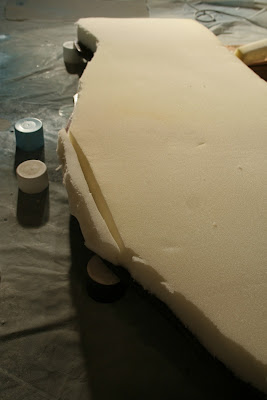
I used an X-ACTO knife to cut the foam into the shape of the headboard. You can also use an electric carving knife if you have one.
Next I decided on the tufting pattern. I looked at some photos of diamond-tufted headboards online to get an idea of how many I wanted. You can squeeze lots onto a headboard, or keep them more sparse. I forgot to take a photo of the next few steps, but I used a measuring tape and a pencil to draw a grid on the back of the headboard and mark the placement of the buttons. I used a marker to indicate where the holes would be.
I used my cordless drill with 1/4-inch drill bit to drill through the headboard at each of the hole marks. I tried drilling all the way through the foam as well, but the drill bit kept getting stuck, so that idea got nixed.
Once all my holes were drilled, I wiped away the sawdust and used spray adhesive to attach the foam to the front of the headboard.
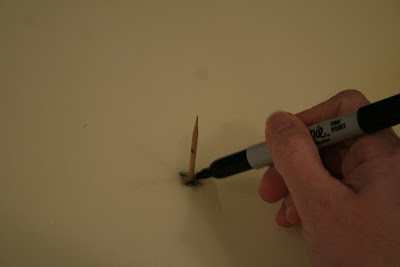
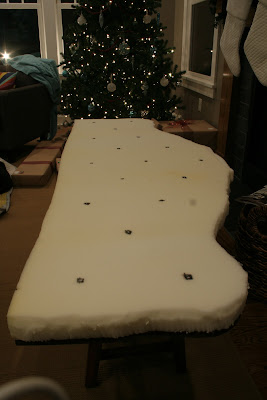
Since I needed to see the holes from the front of the headboard, I stuck a skewer (you could actually use your upholstery needle) through the back of the headboard, through the hole, through the foam, and then made a circle around the skewer, onto the foam, to mark where the button would go.
Here's what it looked like when I had made all my marks. You can see I was doing this during the holiday season!
Since I wanted deep tufting, I needed to create divots for each of the buttons to settle into. I used a small, but sharp, paring knife to cut my divots into a funnel shape, larger at the top than the bottom. The bottom should be the same size as your buttons, or just smaller.
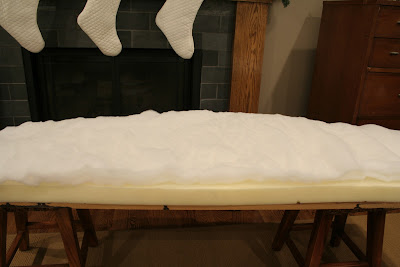
Next I placed my batting on top of the foam. I had enough to double it over, creating a little extra thickness.
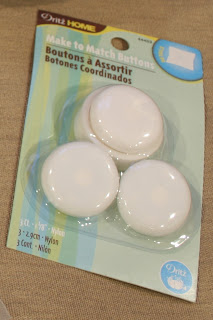
At some point, you have to create your buttons. I used these decorator button-making kits, which I purchased at JoAnn's. Just follow the instructions on the back of the package. They were easy to make, but time consuming. The more tufts you have, the more buttons you need, so plan for how much fabric you'll need.
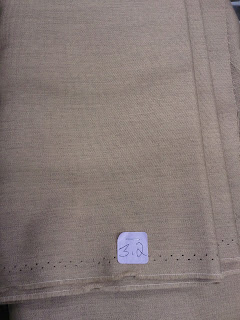
I had picked up this linen-look fabric several months ago for $4.99/yd at Old Time Pottery. I knew I'd use it some day. My original plan was to use a fabric drop cloth for the headboard, but then I remembered I had this fabric in storage. It was around the same price, and this fabric was much softer.
Apparently I missed a few photos, so imagine that I showed you the process of making the buttons. The next few steps I also forgot to take photos of. I guess with this being my first time, I was so entrenched in figuring out what I was doing that I neglected to stop and photograph everything.
After all the buttons were made, I draped the fabric across the headboard, leaving an equal amount of overlap on all sides. It was then time to start tufting. It's best to start at the very center, so you can keep things lined up as you go along.
I threaded my long upholstery needle, and used trial and error to poke the needle from the center hole at the back of the headboard, straight through to the front. It's easy to get lost going through the foam, so you have to keep trying until you get the needle through straight. Once you pull the needle all the way through, you need to thread it through the button, then push the needle back through (straight, not crooked) to the back. Once you reach the back, make sure you have a buddy. One person needs to push the button into the hole in the foam as far as possible, and the other needs to pull the thread through the back, as tight as you can. The thread should be pulled to the side at the back, and whichever of you has a free hand needs to put a staple over the thread.
Still pulling the thread taut (otherwise it will loosen and the button will be loose), pull the thread the opposite way and staple it, then keep going back and forth in a zigzag pattern, putting in several staples. This will help keep the thread taut and secure. Here's a photo, which hopefully helps make more sense of this step for you.
The next tuft should be in the same row, moving out one space. You can sort of push the fabric into the hole from the front, creating the folds you want with the fabric. Follow the same steps as before with the button and the thread. Here's how the headboard looked after the first few buttons were secured.
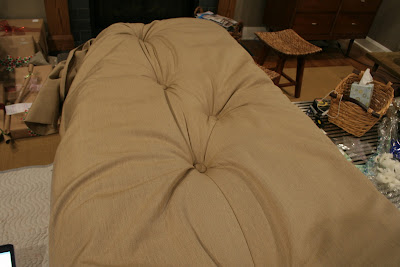
A few more buttons were done, and the diamond-tufting pattern is taking shape! As you go along, help the fabric by creating the folds between the buttons. Remember, you're creating a diamond pattern.
Once you get all your buttons done, it's time to flip the headboard over. I decided to staple down my batting first. I pulled it tight around the foam, and stapled it on the back side. Example below.
Once the batting was secured all the way around, I did the same thing with the fabric. Again, apparently I have no photos of this step. When stapling the fabric, you want to be mindful of where and how the extra fabric is folded. Within the headboard, you want the folds to be diamond-shaped. At the edges, however, you want the folds to be straight. For example, at the top and bottom of the headboard, the folds should be vertical. For the sides, the folds should be horizontal. In some areas I didn't have a lot to fold over, depending on the curves of the headboard. Curves are obviously trickier than straight rectangles! At the inside curves on either side of the top of the headboard, I had to snip the fabric a little at the back to help get it around the curve.
Here's what it looked like when the fabric was all stapled!
The next step was the legs. If you cut your own headboard out of MDF, you have a couple choices. Either you can build legs, or you can use D-rings or a French cleat to attach the headboard directly to the wall. In my case, legs came with the used headboard I purchased.
The Teen has a queen size bed, the same as my mom's bed for which I was making this headboard, so I used his bed to test the height of the headboard. The headboard itself does not come up as high above the bed as I would have chosen if I were starting it from scratch, so I wanted to adjust it as high as I could while keeping the bottom of the headboard hidden behind the mattress. Here's the headboard at the best height, as seen in The Teen's room.
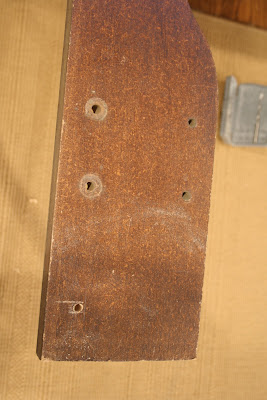
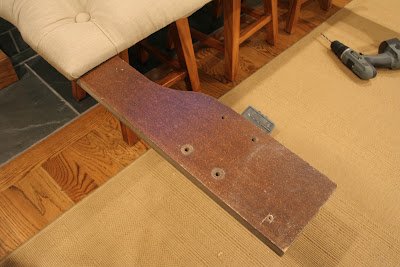
The legs already had four holes drilled. In the photo below, the top two holes at the left are for queen beds. The two holes at the right were for twin beds. There were screws that came with the legs, which attach it to a standard metal bed frame. Luckily Mom already had one of those.
Because I wanted the headboard to sit higher than it was originally designed, I had to drill a new hole at the bottom left, as seen above. Below is the leg attached to the headboard.
Because the wood legs were so ugly and would be seen at the sides of the bed, I decided to upholster them. Luckily I had plenty of fabric left to do it. No foam or batting is needed, because nobody will be leaning against the legs. I detached the legs and wrapped the fabric around, stapling around the back like I did with the headboard itself. I was careful not to cover the holes at the top, where the legs attached to the back of the headboard. For the hole at the bottom that would screw into the metal bed frame, it was okay to cover it.
Here's what it looked like when it was all ready!
When it was time to screw the bed to the frame, I could feel where the hole was for the screw, and I just screwed right through the fabric. No biggie.
Check out yesterday's post to see more photos of the headboard in place at my mom's house!
Glad to have not only the project done, but the tutorial done. I started it just after I finished the headboard, when things were fresh in my mind, but only finished it up tonight, a month and a half later, and some of the details are a bit fuzzy, so if any of the steps don't make sense, let me know and I'll explain/edit the post.
Special thanks to Jenny of Little Green Notebook and Kristi of Addicted 2 Decorating for sharing your diamond-tufting wisdom. I followed some of their tips, as well as some others I read online, and made the rest up as I went along.
And ... be sure to come back so I can tell you about my new favorite tool ... my pneumatic stapler!
Hollie
Linking up here:
- Saturday Night Special at Funky Junk Interiors
- Weekend Wrap Up Party at Tatertots & Jello
- Nifty Thrifty Sunday at Nifty Thrifty Things
- Sunday Showcase Party at Under the Table and Dreaming
- Repurpose, Remodel, Reveal Transformation Party at The Rooster and the Hen
- Overflowing with Creativity at It's Overflowing






wow! that is so awesome Hollie! super tute, I'm pinning this post!
Replygail
Fabulous!! Thank you for putting together this tutorial - I don't know why I'm so scared of doing this project, but you've given me a bit of confidence that it really can be done!! ;) xxx
ReplyThat's for the great tutorial. It came out beautiful!!
ReplyLooks great! I'm going to make one sometime and appreciate you explaining the steps.
ReplyBeautiful job! Thanks for sharing your tutorial. I would love to give this a try one day...yeah, I'm a procrastinator too! LOL!!!
ReplyYour headboard and your tutorial are both AMAZING! Thanks for the inspiration. :)
Reply-Revi
Thanks so much for showing how this is done......I've been trying to get up my courage to give it a try!!
ReplyLaurel - SoPo Cottage
Great tutorial! Thanks for all the details, it turned out fabulous!
ReplyYour headboard is beautiful!!! Thank you for posting an easy to follow tutorial.
ReplyBeautiful! I'd love to have you join my party that just opened!!! XO, Aimee
ReplyI'm soooo impressed! Thanks for sharing. And, yes, I'm super behind in my blog reading. Hope you're having a grand evening. Toodles, Kathryn @TheDedicatedHouse
Reply