Tuesday, February 28, 2012

5 Ways to Avoid Being a Linky Party Crasher


If you've been a blogger for a while, most likely you have participated in a linky party.  And some of  you even host your own! Before I went back to work, I participated in linky parties whenever I had projects I was excited to share.  And even if I don't participate by linking my own content, linky parties are a great way to be inspired and to find other great blogs.

However ... there are a few bloggers out there who take advantage of linky parties for their own promotion. Don't get me wrong -- I know we all link up to promote ourselves.  But there are ways of doing it right, which will eventually net you more readers, and ways of doing it wrong, which turn potential or current readers away.

Are you following these basics of linky party etiquette?

1.  Only link up original content

Yes, that professionally designed and photographed room is gorgeous, and I totally see why you were inspired by it, but don't post someone else's design on a linky party.  Linky parties are for sharing your own projects.  (Unless otherwise specified for a certain linky party by its host.)

2.  Pick a few parties, not every party

I get that you want to promote your blog, but when I see that someone has linked the same project up to tens of parties, I think, "Wow, that blogger really gets around."  And that's not a compliment -- it's a turnoff. Pick a few parties and be satisfied with that.

3.  Mix up where you party

If you want to promote your project, blog, or general awesomeness to lots of people, rather than linking up to several parties at the same time, switch things up a bit.  Post one project to certain parties and other projects to other parties.  Spread the love!  You still share your mad skills with lots of different people, but not all at the same time.  It keeps parties fresher, and you don't look like a linky party hussy.

4.  For pete's sake, follow the host's rules

Each host has the honor of choosing her rules.  If it's a furniture-only party, please don't post recipes.  If the rules state that you must link back to the party, do it!  It's rude to use the host for your own benefit and not give her any of the rewards.  The more link-backs, the better the host's Alexa ratings, etc.  You don't think she's doing it just for you, do you?  Oh, and if the host asks that you not link up items for sale, don't.  It's okay to post a tutorial of an item you made.  But don't link to that item's Etsy link or to your own shop.

5. Make sure your photo linked 

Sometimes linky tools get a bit overwhelmed and the photo of your project doesn't show up in the linky list.  If you're too busy running off to link somewhere else, you might not realize it.  As exciting as your description might be, you're not going to get much traffic with no photo.  Be sure to check!

This post is titled "5 Ways to Avoid Being a Linky Party Crasher," but I'm going to give you one bonus for good measure!

6.  Check out the projects/blogs of others who partied

Don't just link and run!  Be sure to stop by and check out some other blogs.  Leave a comment to let the blogger know you were there.  It's a great way to make connections with other bloggers.  After all, don't you light up when someone visits your blog and leaves you a nice message?  This is your opportunity to pay it forward.  And if you're not the altruistic kind, each comment you leave is an opportunity for that blogger or her readers to find you too!

-----------------------------------------------


I'm sooo curious to hear what you think.  Are you in total agreement?  Or do you think I've got it all wrong? What did I not mention that irks you?  Lay it all out, yo.

Hollie

Sunday, February 26, 2012

Designing a ceiling medallion wall art layout

Last time, I showed you the awkward wall in my master bedroom that's in need of some help.  I discussed all the options I had considered, and told you I've decided to dress it up with ceiling medallions as the wall art (like I'd been crushing on).  I wanted to fill in the space between our dresser and the blue chair to its left, by the window.  


After researching hundreds of medallion options, I struggled to decide which combination would look best.  I decided to copy and paste the designs I liked most (of various sizes and styles) into a PowerPoint document.  Of course, I had to pass up some that were priced unreasonably high, as multiple medallions can add up fast.  With each design, I listed several website URLs and the corresponding prices.  Picking my favorite design/size/price combinations, I decided to create an electronic layout to see how they looked together.  In PowerPoint, I used a white rectangle to represent the dresser and a black rectangle to represent the TV.  Here's a screen shot of one of my layouts.


After choosing a desired layout, I created templates of the medallions out of wrapping paper, following Joi's suggestion.  I used painter's tape to adhere the templates to the wall in the layout I had designed.


The idea was to ensure I liked the look before I committed to purchasing anything.  I settled on the layout shown above, and ordered the medallions accordingly.  The medallions I ended up ordering were slightly different than shown on the PowerPoint layout above because some were out of stock or the shipping cost ended up being cost-prohibitive.

Of course, by the time they had arrived, I had decided that the area to the right of the dresser needed something too, so I decided to spread them out all the way across the wall.  Accordingly, I added additional medallions to my PowerPoint layout.  Here's a screen shot of the basic design I ended up with.


The next step was creating a new template layout on the wall.  Below you can see the templates on the wall as well as my first round of ceiling medallion purchases sitting on the floor.


I continued to make some tweaks, and then placed my second order.  A few days later the rest of my medallions arrived.  As Joi recommended, I had purchased Command Strips to hang them.  Unfortunately the strips were not sticking to the back of some of the medallions, so I had to improvise and use super glue to adhere the strips to the backs.  

I got a few of the medallions hung while the glue on the others was drying.  I had limited time that night, and was going to get back to the project the next day, but I had a bit of a setback.  I just might have severely sprained my ankle going down the concrete stairwell at work.  It might have happened because I was playing Words with Friends and wasn't looking where I was going and missed a step.  Maybe.  But since nobody saw it happen, there's no proof that's how it happened.  Let's just say I'm lucky it was the last step before a landing, and not the middle of the stairs.

So ... I'm laid up right now, nursing my ankle. I can walk on it a bit, but it's best that I don't.  Dr. Internet said to follow the RICE method:  rest, ice, compression (Ace bandage) and elevation.   This weekend I've been spending most of my time on the couch, keeping my foot elevated and iced (intermittently).  I guess I'll get back to hanging the rest of the medallions in a few days.  No climbing on stepstools for me right now, and I don't want to stick The Mr. with the job, as he's got enough extra tasks to do while I'm staying off my foot.  (Poor guy had to shop for outfits for our 3-year-old niece's birthday.  He's not keen on picking out girl clothes, but I must admit he did a good job!)

Now I'd love to hear from you:
  • What do you think about this whole ceiling medallion process?  Does it seem crazy, or cool?  
  • Got any unusual projects going on at your house?
  • Have you ever injured yourself because you were doing something stupid like me?

Hollie

Saturday, February 25, 2012

So many ideas for such a boring wall

I don't even want to count the number of times I've promised an upcoming photo tour of our master bedroom.  It's been going on for at least six months now.  Each time I think I'm just about ready, I realize there's another part of the room that needs sprucing up before the big reveal.

Here's the awkward wall in our master bedroom that really needed something.  Anything. This is the wall that was keeping me from sharing a full tour of this room.


I know even in magazines, a room tour doesn't mean you have to show every last inch.  Mostly we just see the best angles.  But my painted dresser is one of my favorite projects to date, and that wall behind it is just too sad to feature.  You know you agree.

Many ideas for the wall have come and go.  I considered stenciling.  After all, any blogger worth her weight in gold has done a superb stenciling project, right?  Ha ha.  I considered wallpaper too, but I just couldn't commit to either.

I thought I had finally found a solution when I came across the gallery wall I had seen but forgotten on Emily A. Clark's blog.

via Emily A. Clark
We are TV junkies at our house, and I find no reason to hide our TV.  But I like Emily's idea of camouflaging it so it's not just a big black hole.  A gallery wall around our TV is just what our master bedroom needed!

During one of my many daily visits to Fab.com, I discovered Heather Mattoon's "Cats in Clothes" art and fell in love.  I didn't order it that day (when it was discounted), but found her on Etsy and ordered this set of 12 postcards.  They would be my first art for my gallery wall.

via HeatherMattoonArt on Etsy

I purchased another piece of art at Fab.com during another visit -- my second piece for my new gallery wall.  But ... in true Hollie fashion -- just ask The Mr.-- by the time the second piece of art was shipped, I already had another idea that left the gallery wall in the dust.

Ceiling medallions as wall art!

Remember a couple weeks back when I shared my crush on ceiling medallions?  I decided to turn that crush into a relationship.  As you saw in that post, I researched every photo I could find with ceiling medallions used on the wall.  Strangely, I had forgotten about this one I had pinned a few months ago (and just rediscovered on my "" Pinterest board this afternoon:

via Country Living

Uh-maze-ing!

Anyway, after researching all the ceiling medallion wall art installations I could find, I started researching the medallions themselves.  Holy cow ... there are so many to choose from, at all price points.  They range from just a few inches in diameter to about three feet in diameter.

I probably spent at least a month figuring out what all the options were in the price range and size range I wanted, and then researching where I could find the best price.  Then I created a design using PowerPoint so I could figure out what combination of medallions I wanted to use.

Next time I'll tell you more about how I decided on my design and how I created templates on my wall to make sure I was happy with the design before making any purchases.  After all, I'm not sure anyone wants to read any longer of a post today!

Hollie

Tuesday, February 21, 2012

How to upholster a diamond-tufted headboard


Last time I showed you the diamond-tufted headboard I made for my mom.  Today I'll give you the step-by-step tutorial.  If I can do it, you can too!


Materials:
  • Piece of wood or MDF cut to the shape of the headboard (or wooden headboard to cover)
  • 2" foam large enough to cover the headboard
  • Spray adhesive
  • Button cover kits
  • Hi-loft batting - enough to cover headboard and foam, with a few inches extra on all sides
  • Fabric - enough to cover headboard, foam and batting, with several inches extra on all sides, plus enough to make buttons
  • Scissors
  • Upholstery needle - long enough to go through the thickness of the wood, foam, batting and fabric
  • Staple gun and plenty of staples
  • Upholstery thread or something as strong (I used jewelry thread I had on hand, until it ran out)
  • Drill with 1/4" drill bit
  • Pencil
  • Marker
  • Measuring tape
  • Paring knife and/or X-ACTO knife
  • Pliers - to remove a rogue staple if needed

I had assumed I would buy some MDF at the hardware store, and cut it into a fun shape with a jigsaw.  But what did I find on a quick stop by my local Goodwill?  A perfectly shaped queen-size faux-wood headboard, just screaming to be upcycled.


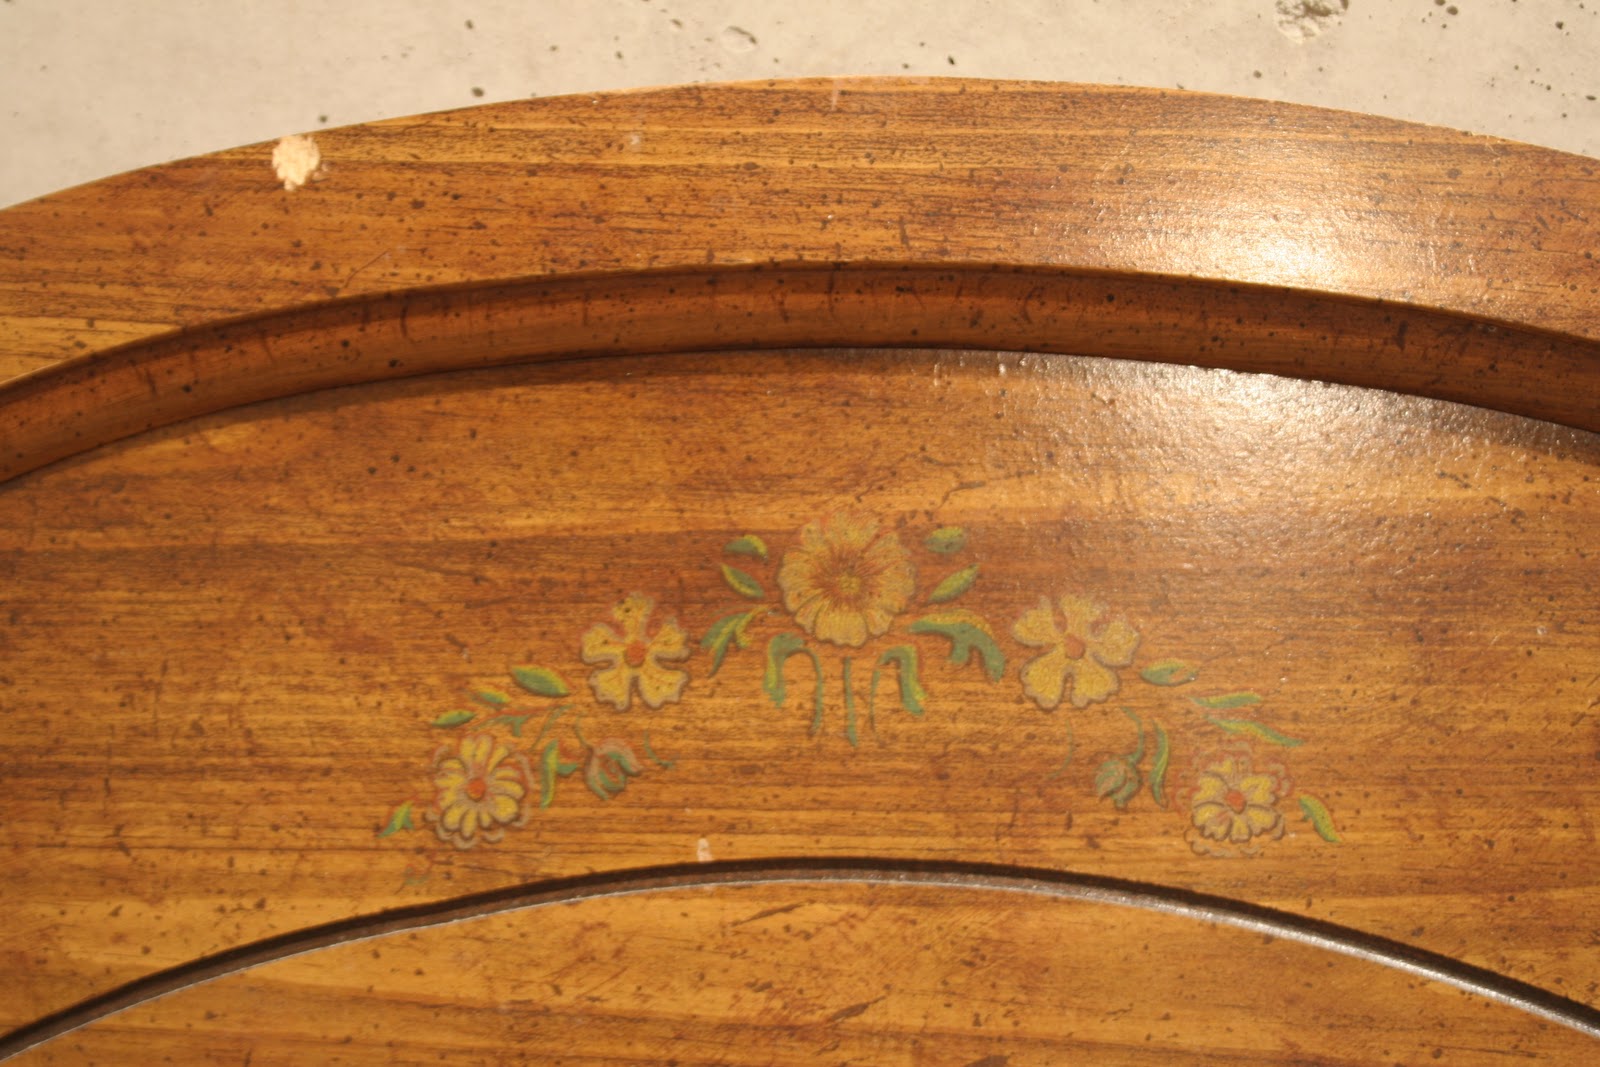
Do you see the ugly faux-wood finish and the awful decorative flowers on the front?  How very '70s.


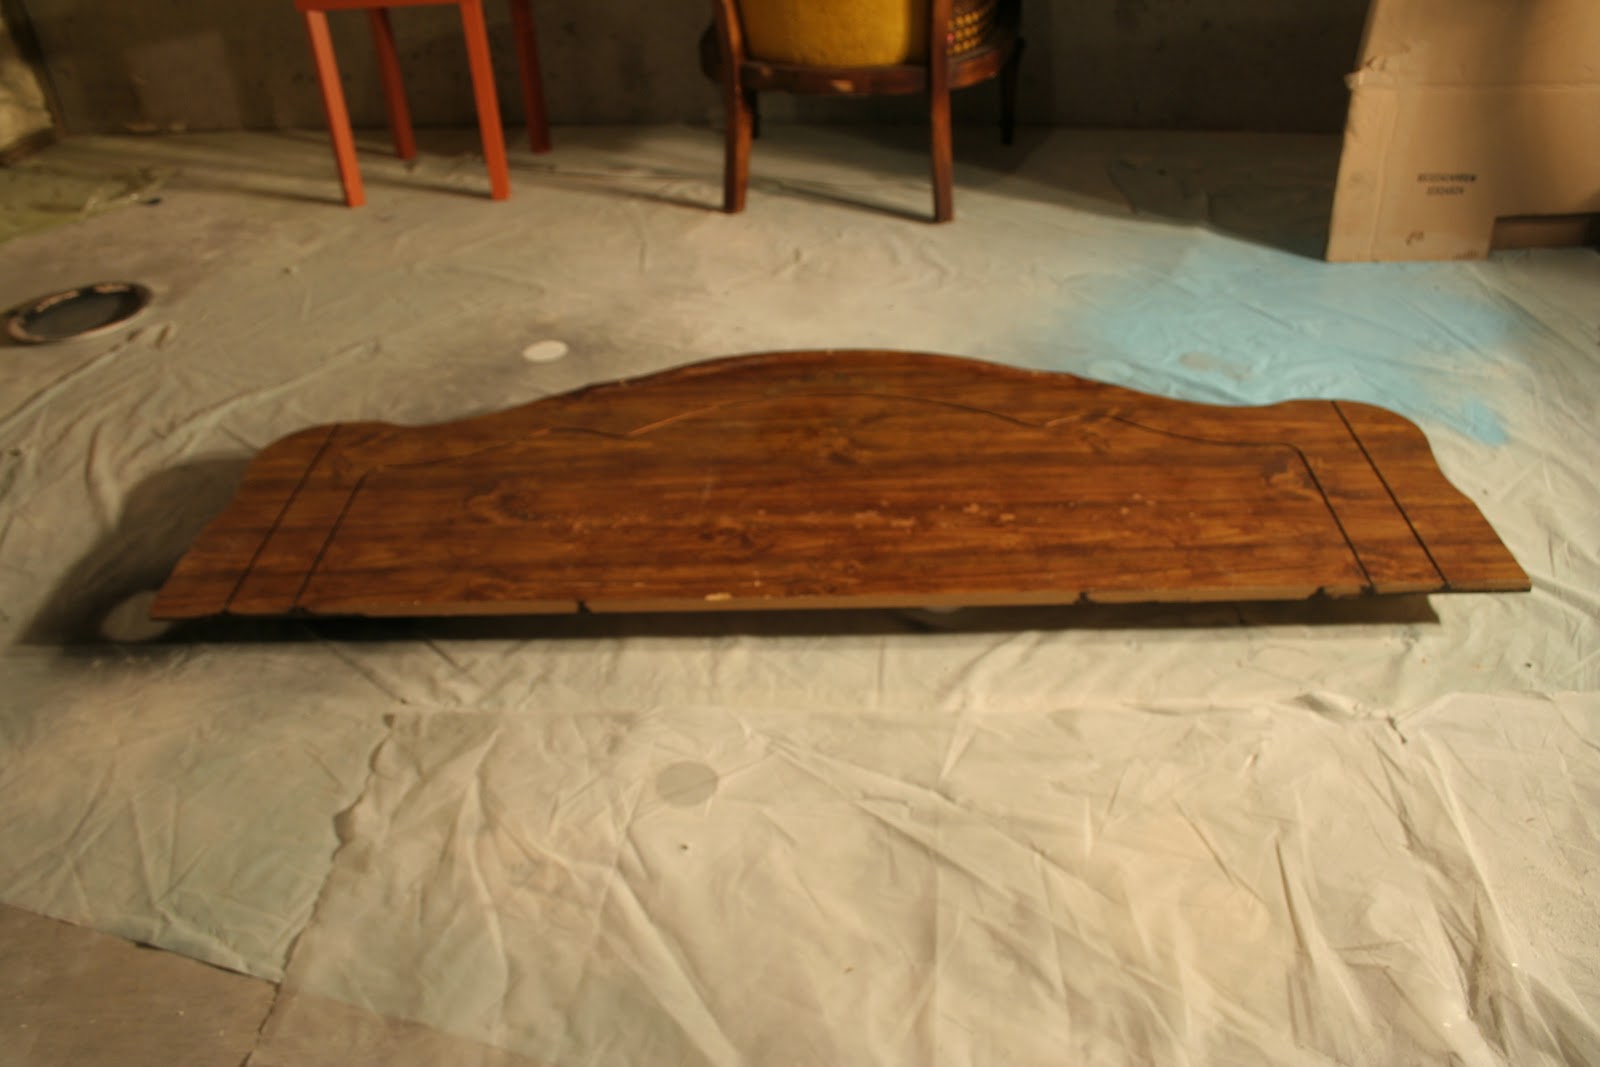
The first thing I did was remove the molding across the top middle of the headboard, so it would be flat rather than three-dimensional.  Then I removed the legs and stored them.


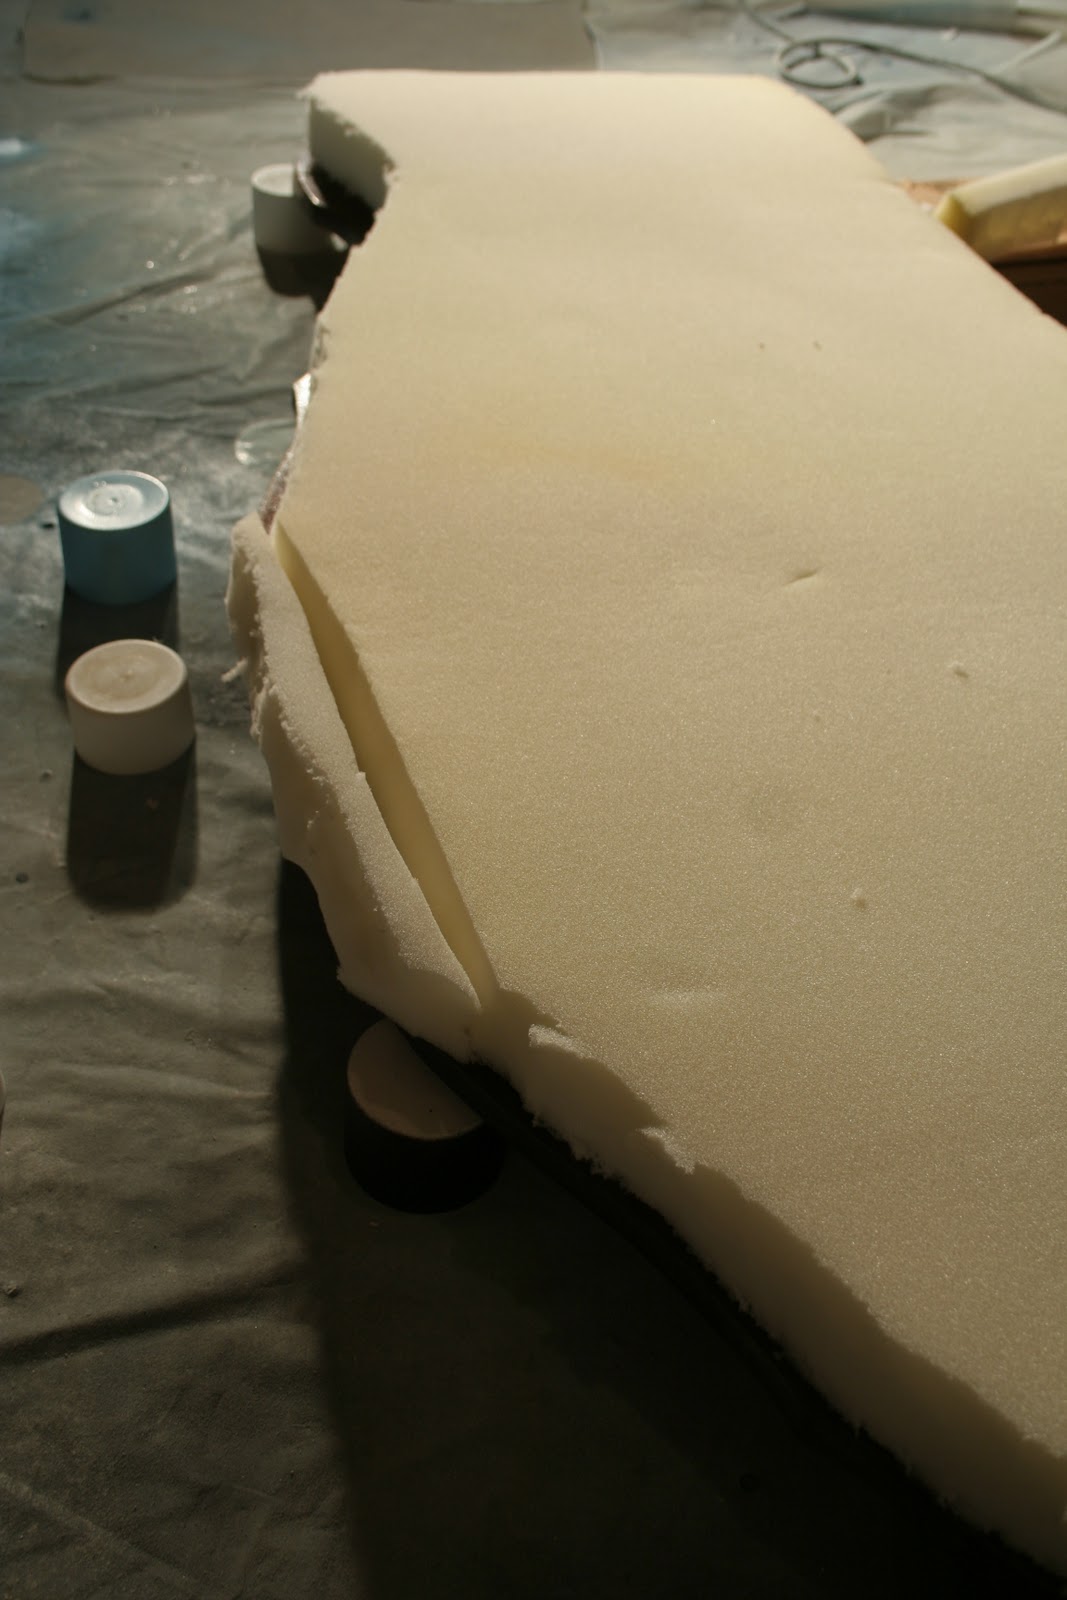
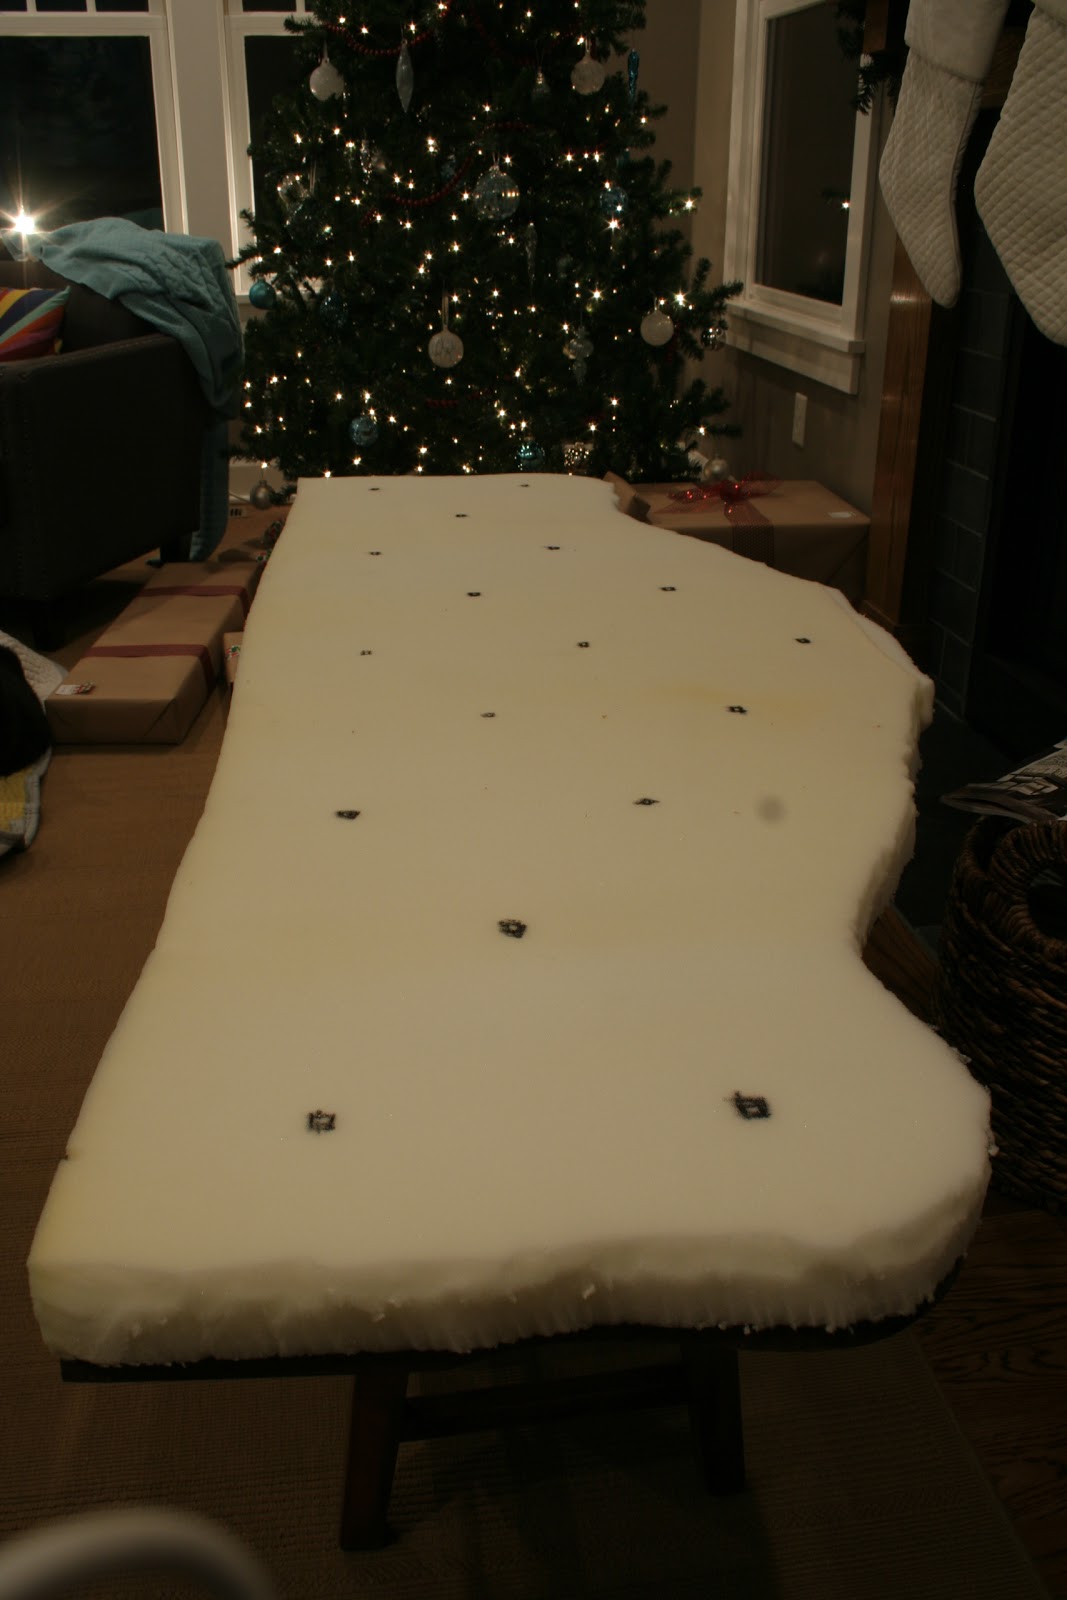
Next I spread my foam out on the ground and sat the headboard on top of it.  I traced around the headboard shape onto the foam.


I used an X-ACTO knife to cut the foam into the shape of the headboard.  You can also use an electric carving knife if you have one.


Next I decided on the tufting pattern.  I looked at some photos of diamond-tufted headboards online to get an idea of how many I wanted.  You can squeeze lots onto a headboard, or keep them more sparse.  I forgot to take a photo of the next few steps, but I used a measuring tape and a pencil to draw a grid on the back of the headboard and mark the placement of the buttons.  I used a marker to indicate where the holes would be.

I used my cordless drill with 1/4-inch drill bit to drill through the headboard at each of the hole marks.  I tried drilling all the way through the foam as well, but the drill bit kept getting stuck, so that idea got nixed.

Once all my holes were drilled, I wiped away the sawdust and used spray adhesive to attach the foam to the front of the headboard.


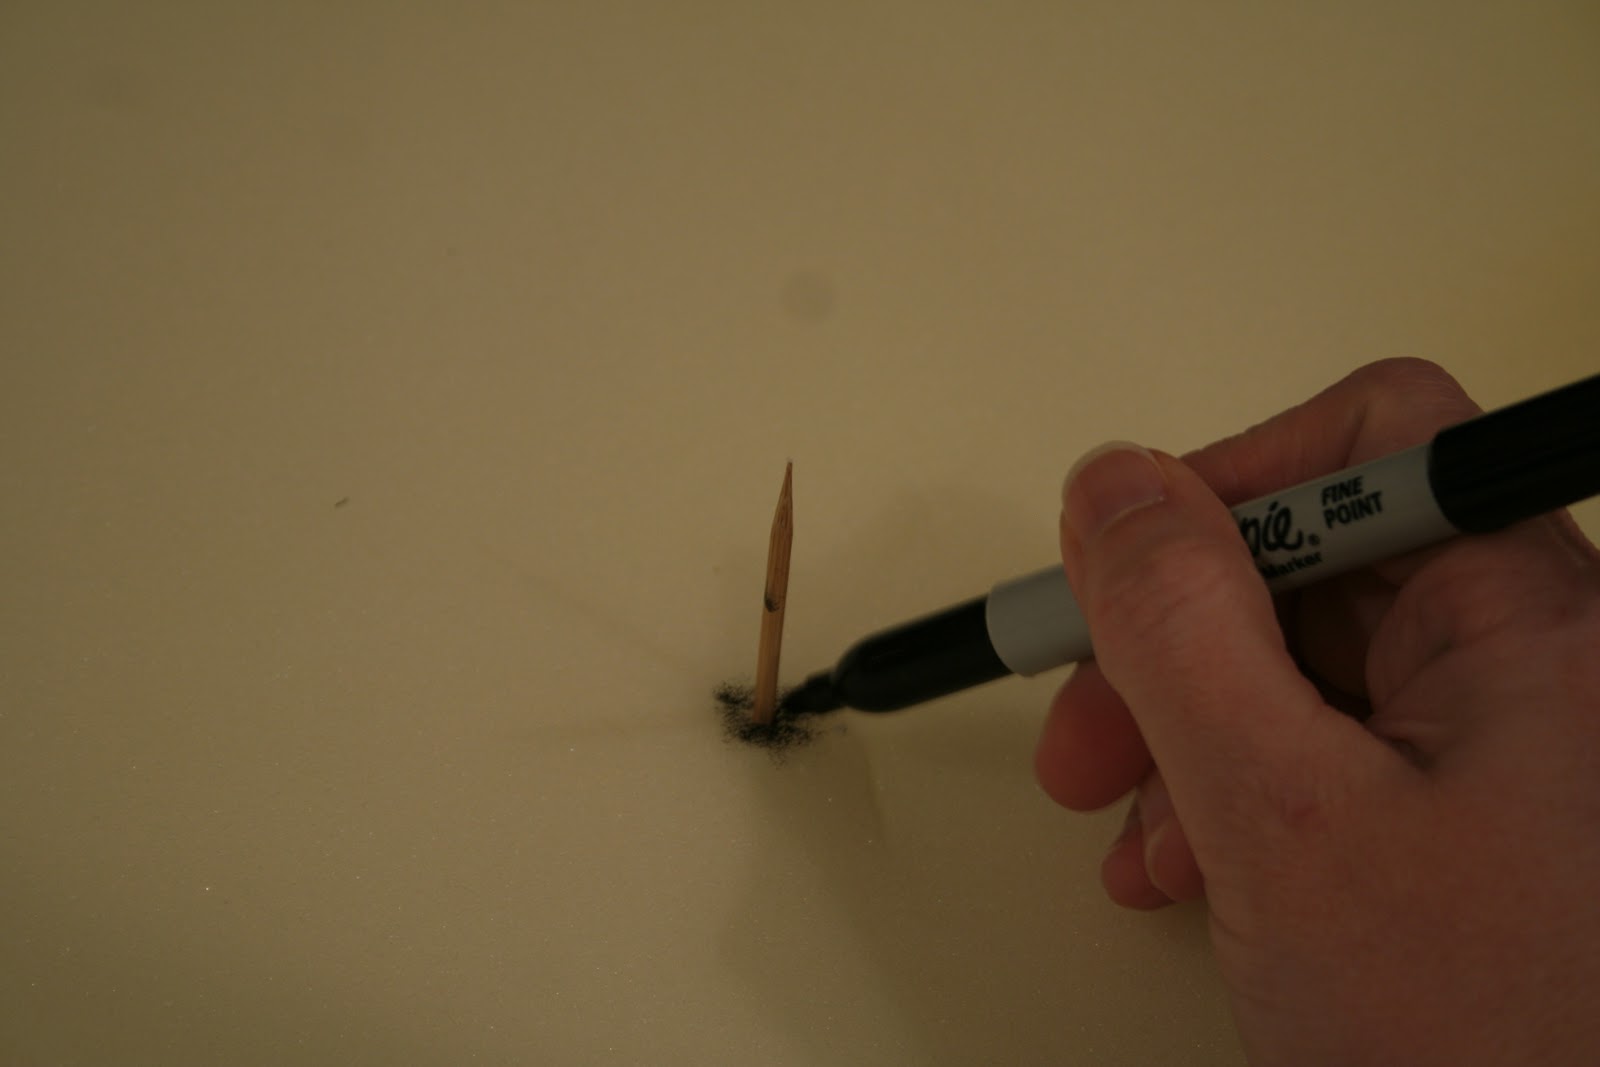
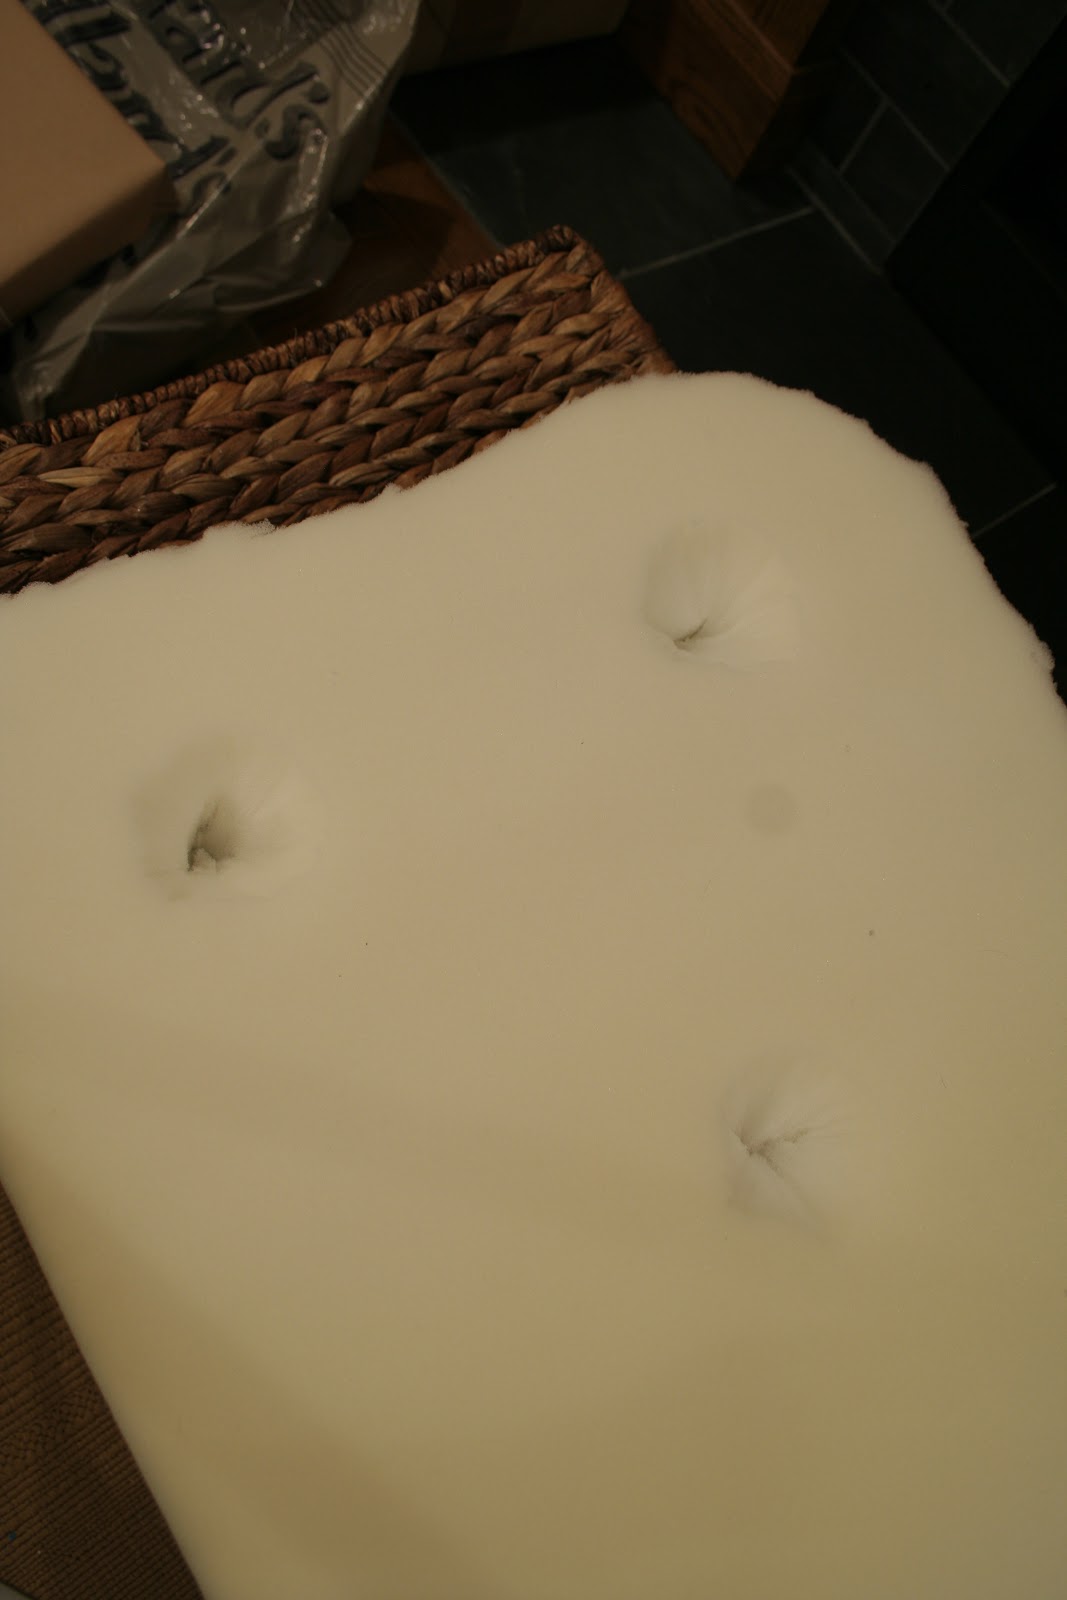
Since I needed to see the holes from the front of the headboard, I stuck a skewer (you could actually use your upholstery needle) through the back of the headboard, through the hole, through the foam, and then made a circle around the skewer, onto the foam, to mark where the button would go.


Here's what it looked like when I had made all my marks.  You can see I was doing this during the holiday season!


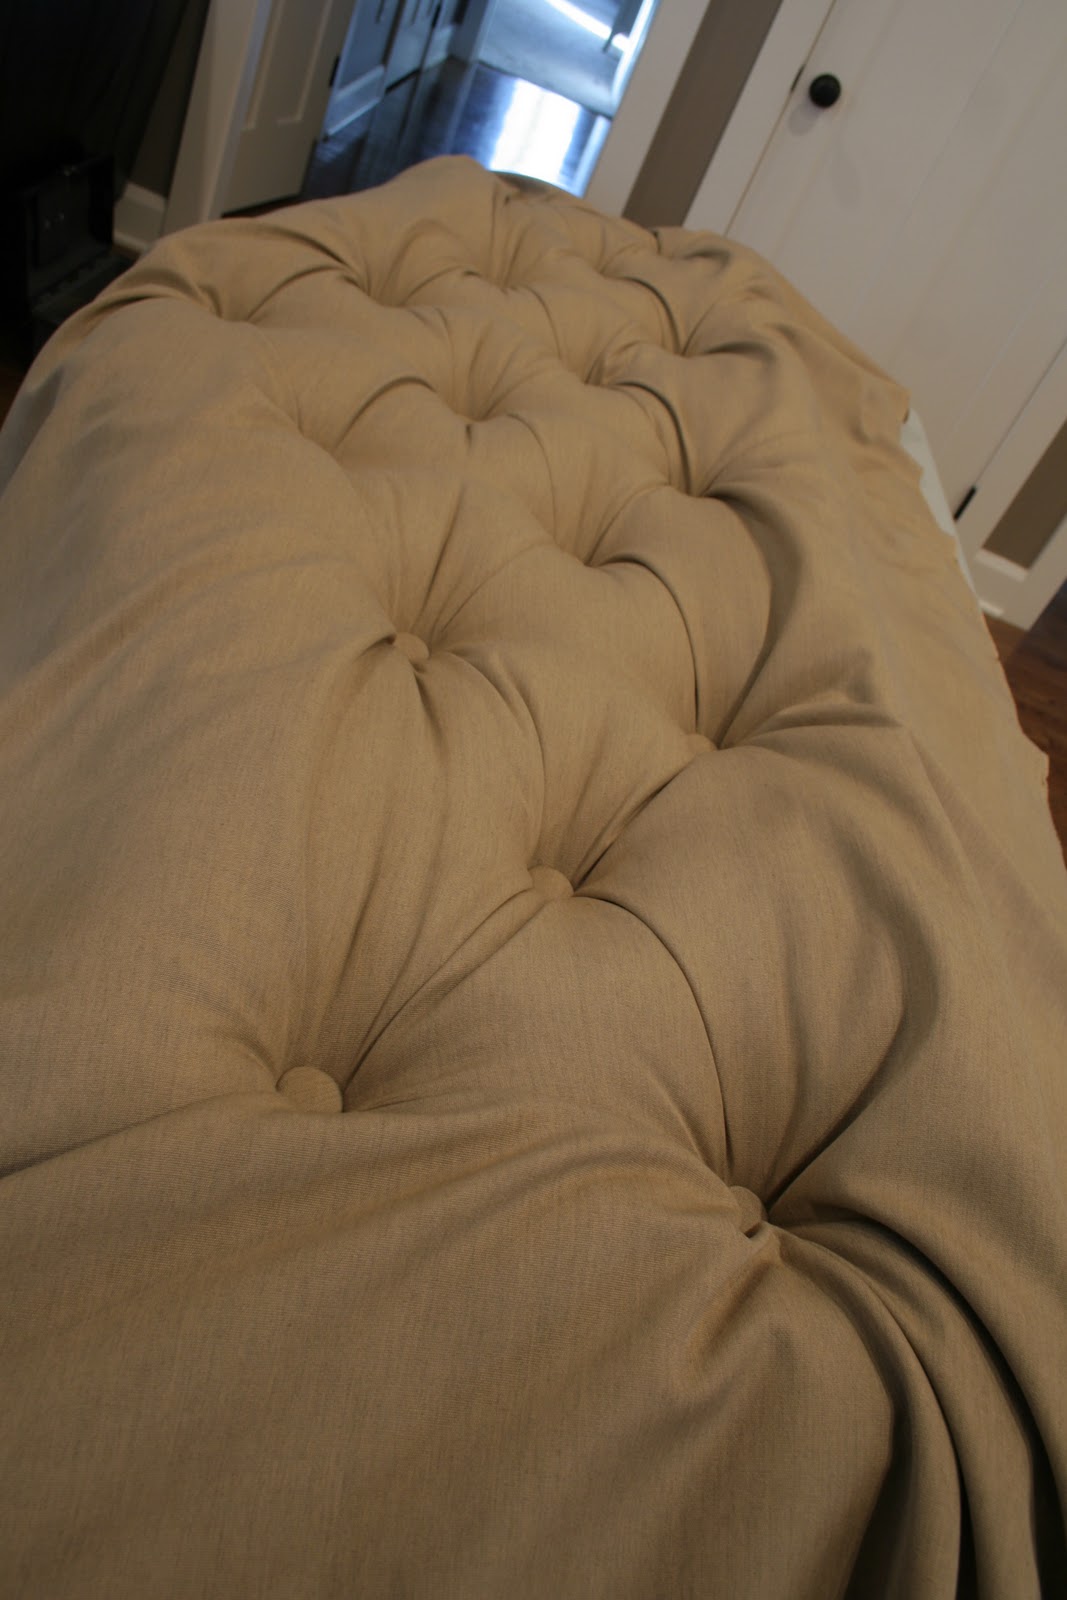
Since I wanted deep tufting, I needed to create divots for each of the buttons to settle into.  I used a small, but sharp, paring knife to cut my divots into a funnel shape, larger at the top than the bottom.  The bottom should be the same size as your buttons, or just smaller.


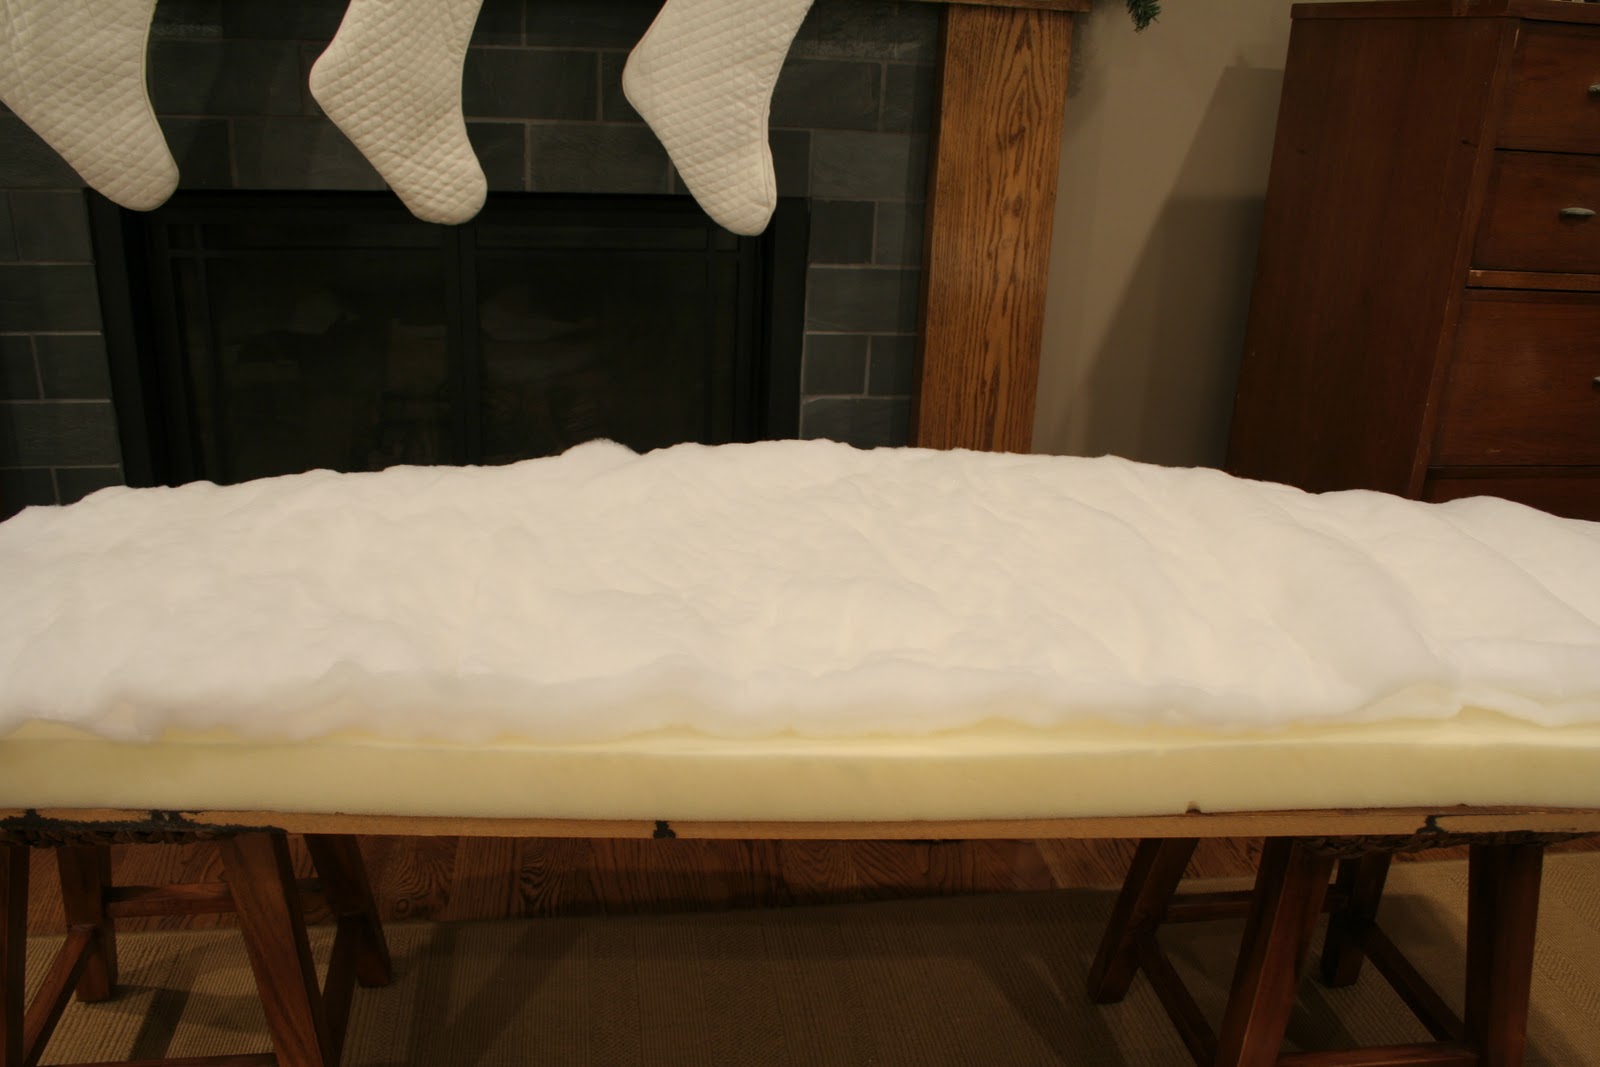
Next I placed my batting on top of the foam.  I had enough to double it over, creating a little extra thickness.


At some point, you have to create your buttons.  I used these decorator button-making kits, which I purchased at JoAnn's.  Just follow the instructions on the back of the package.  They were easy to make, but time consuming.  The more tufts you have, the more buttons you need, so plan for how much fabric you'll need.


I had picked up this linen-look fabric several months ago for $4.99/yd at Old Time Pottery.  I knew I'd use it some day.  My original plan was to use a fabric drop cloth for the headboard, but then I remembered I had this fabric in storage.  It was around the same price, and this fabric was much softer.


Apparently I missed a few photos, so imagine that I showed you the process of making the buttons.  The next few steps I also forgot to take photos of.  I guess with this being my first time, I was so entrenched in figuring out what I was doing that I neglected to stop and photograph everything.

After all the buttons were made, I draped the fabric across the headboard, leaving an equal amount of overlap on all sides.  It was then time to start tufting.  It's best to start at the very center, so you can keep things lined up as you go along.

I threaded my long upholstery needle, and used trial and error to poke the needle from the center hole at the back of the headboard, straight through to the front.  It's easy to get lost going through the foam, so you have to keep trying until you get the needle through straight.  Once you pull the needle all the way through, you need to thread it through the button, then push the needle back through (straight, not crooked) to the back.  Once you reach the back, make sure you have a buddy.  One person needs to push the button into the hole in the foam as far as possible, and the other needs to pull the thread through the back, as tight as you can.  The thread should be pulled to the side at the back, and whichever of you has a free hand needs to put a staple over the thread.

Still pulling the thread taut (otherwise it will loosen and the button will be loose), pull the thread the opposite way and staple it, then keep going back and forth in a zigzag pattern, putting in several staples.  This will help keep the thread taut and secure.  Here's a photo, which hopefully helps make more sense of this step for you.


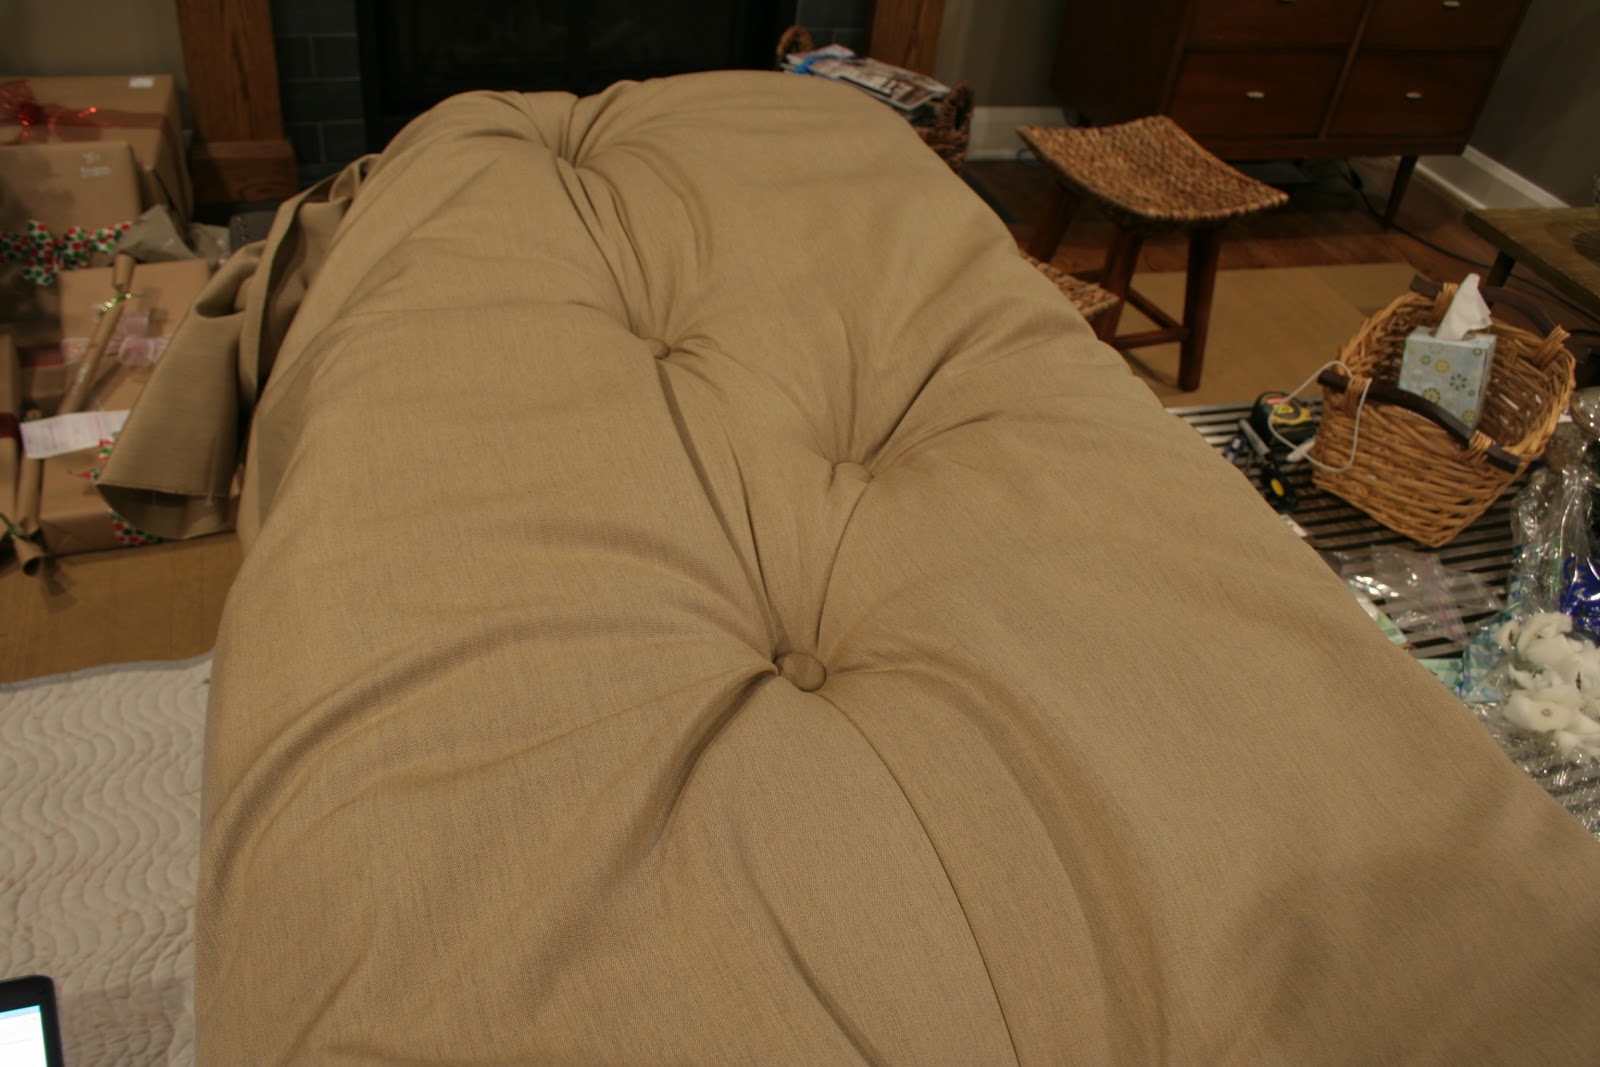
The next tuft should be in the same row, moving out one space.  You can sort of push the fabric into the hole from the front, creating the folds you want with the fabric.  Follow the same steps as before with the button and the thread.  Here's how the headboard looked after the first few buttons were secured.


A few more buttons were done, and the diamond-tufting pattern is taking shape!  As you go along, help the fabric by creating the folds between the buttons.  Remember, you're creating a diamond pattern.


Once you get all your buttons done, it's time to flip the headboard over.  I decided to staple down my batting first.  I pulled it tight around the foam, and stapled it on the back side.  Example below.


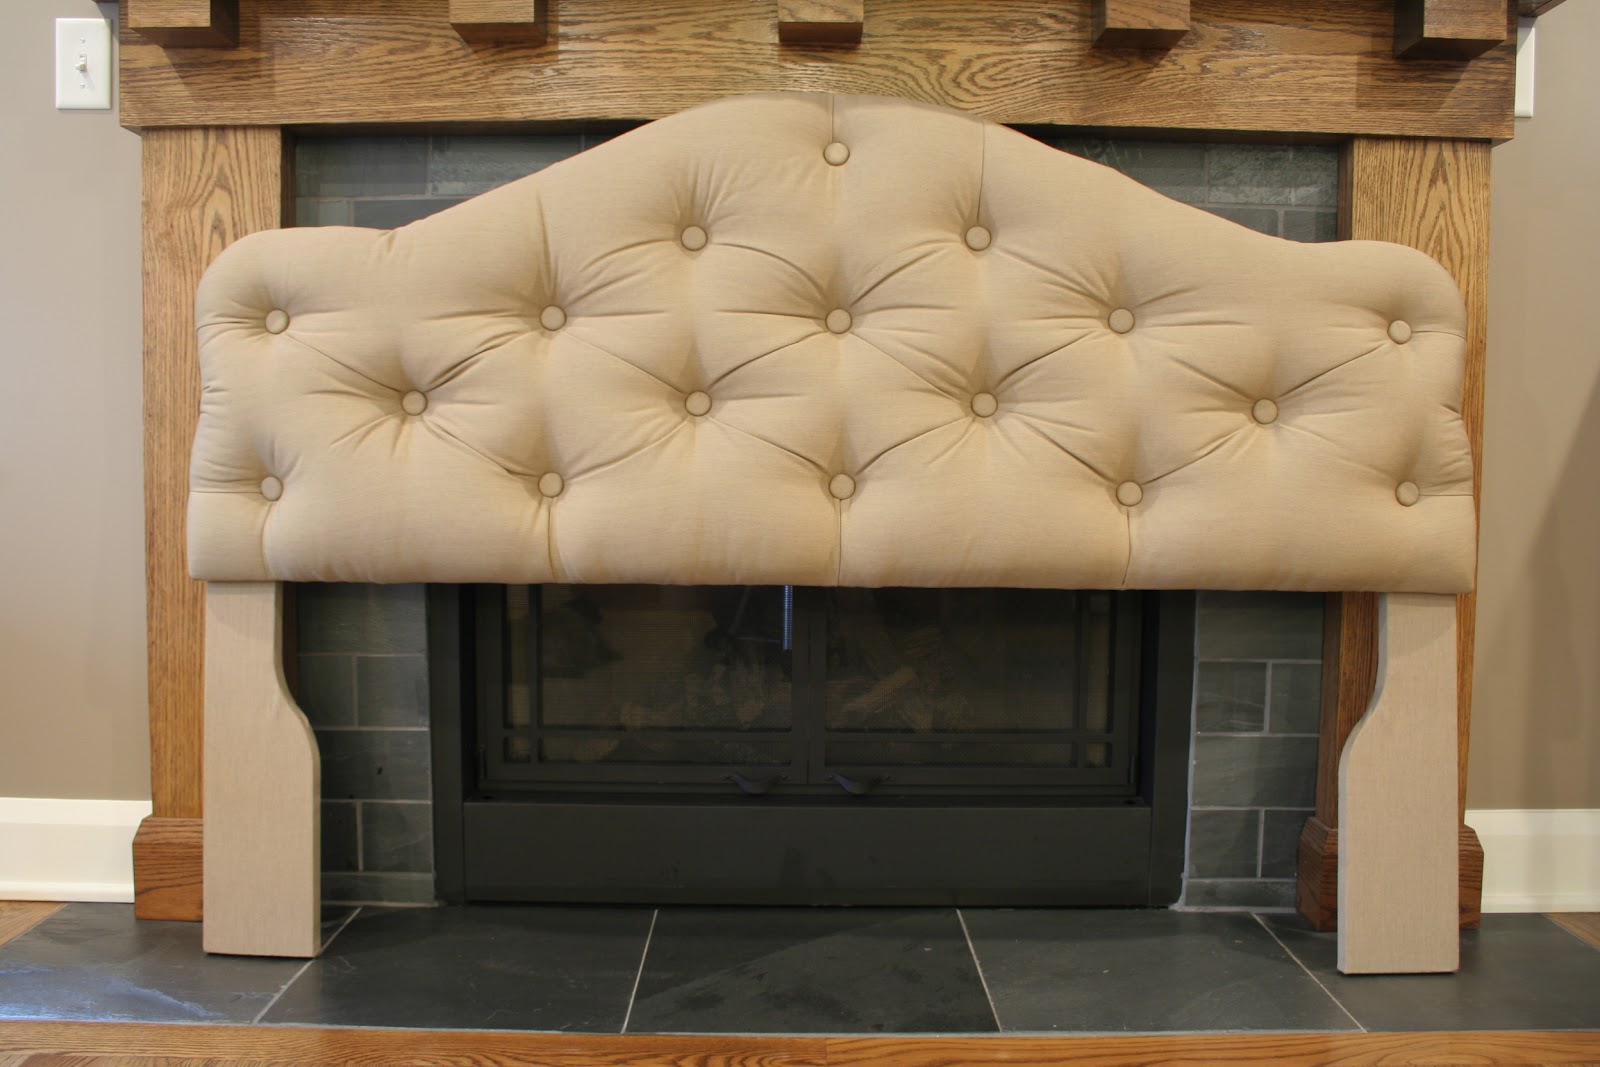
Once the batting was secured all the way around, I did the same thing with the fabric.  Again, apparently I have no photos of this step.  When stapling the fabric, you want to be mindful of where and how the extra fabric is folded.  Within the headboard, you want the folds to be diamond-shaped.  At the edges, however, you want the folds to be straight.  For example, at the top and bottom of the headboard, the folds should be vertical.  For the sides, the folds should be horizontal.  In some areas I didn't have a lot to fold over, depending on the curves of the headboard.  Curves are obviously trickier than straight rectangles!  At the inside curves on either side of the top of the headboard, I had to snip the fabric a little at the back to help get it around the curve.

Here's what it looked like when the fabric was all stapled!


The next step was the legs.  If you cut your own headboard out of MDF, you have a couple choices.  Either you can build legs, or you can use D-rings or a French cleat to attach the headboard directly to the wall.  In my case, legs came with the used headboard I purchased.

The Teen has a queen size bed, the same as my mom's bed for which I was making this headboard, so I used his bed to test the height of the headboard.  The headboard itself does not come up as high above the bed as I would have chosen if I were starting it from scratch, so I wanted to adjust it as high as I could while  keeping the bottom of the headboard hidden behind the mattress.  Here's the headboard at the best height, as seen in The Teen's room.


The legs already had four holes drilled.  In the photo below, the top two holes at the left are for queen beds. The two holes at the right were for twin beds.  There were screws that came with the legs, which attach it to a standard metal bed frame.  Luckily Mom already had one of those.


Because I wanted the headboard to sit higher than it was originally designed, I had to drill a new hole at the bottom left, as seen above.  Below is the leg attached to the headboard.


Because the wood legs were so ugly and would be seen at the sides of the bed, I decided to upholster them.  Luckily I had plenty of fabric left to do it.  No foam or batting is needed, because nobody will be leaning against the legs.  I detached the legs and wrapped the fabric around, stapling around the back like I did with the headboard itself.  I was careful not to cover the holes at the top, where the legs attached to the back of the headboard.  For the hole at the bottom that would screw into the metal bed frame, it was okay to cover it.

Here's what it looked like when it was all ready!


When it was time to screw the bed to the frame, I could feel where the hole was for the screw, and I just screwed right through the fabric.  No biggie.

Check out yesterday's post to see more photos of the headboard in place at my mom's house!

Glad to have not only the project done, but the tutorial done.  I started it just after I finished the headboard, when things were fresh in my mind, but only finished it up tonight, a month and a half later, and some of the details are a bit fuzzy, so if any of the steps don't make sense, let me know and I'll explain/edit the post.

Special thanks to Jenny of Little Green Notebook and Kristi of Addicted 2 Decorating for sharing your diamond-tufting wisdom.  I followed some of their tips, as well as some others I read online, and made the rest up as I went along.

And ... be sure to come back so I can tell you about my new favorite tool ... my pneumatic stapler!

Hollie

Linking up here:

Saturday, February 18, 2012

Diamond-tufted upholstered headboard

I had been promising my mom I'd build her an upholstered headboard since August.  Finally I got around to it in December, just in time for Christmas.  And today I finally took photos of it in its new home.


This was my first attempt at building a headboard of any kind, and I'm quite pleased with how it turned out. More importantly, my mom likes it too!

Be sure to stop by tomorrow with a step-by-step tutorial.  Hey, if I can do it, you can too!

Hollie

Thursday, February 16, 2012

One fish, two fish, red stools, blue stools

Remember the red stools that I was drooling over from another blog and decided to buy for my own kitchen?  Well, they've been given two thumbs-down by the guys in my house.


Last time I checked, I'm the decorator in the house.  However, since the stools are something we'll each be using every day, their opinions do count ... a little.  The Mr. doesn't like the tomato-red color of the chairs, and was expecting something more of a cherry red.  The Teen prefers the wide seat of our current saddle stools, rather than the square seat of the red stools.  He also doesn't like that there's a "hole" at the top. I told him it's just venting.  :)

If I were in love with the red stools, I would overrule their complaints, which I find to be silly.  I do like the stools a lot, but I'm not in love with them.  So ... they're ready to be boxed back up to ship back to Overstock.  Wah-wah.

The stools are powder-coated, and I did think about getting them painted a different color that The Mr. would like better.  After all, they were a good price to start with, so spending a little more to get something we really liked wouldn't be too bad.  But look what I came across on page 10 of the February issue of Better Homes and Gardens last week?


Turquoise stools!  That's even better than red!  I had been looking and looking for turquoise stools, but the only kind I'd found was the original Tolix stools, which cost more than I wanted to pay.  It's hard to tell from the photo whether the stools are new or vintage.  After a lot of searching online, I finally discovered that they're manufactured by Lyon, and they're actually utility stools marketed for manufacturing or industrial applications, rather than homes.


They come in several variations, including color, height, seat back or not, and type of feet.  You can find them sold by several retailers, including Amazon, Buy.com and Wayfair.  The price of the chairs is about double the ones I bought from Overstock, but it's still not bad.  However, the shipping costs seem to be almost as much as the chairs!

I also found these lovely specimens at Schoolhouse Electric.  They look almost exactly like the Lyon version, but the taller version has an extra brace.  Unfortunately they only come in 18" and 30", and I need 24".


I'm confused why the Lyon stools and the Schoolhouse Electric stools didn't come up when I was searching a couple weeks ago.  Maybe I was focused too much on turquoise, aqua or teal, rather than just searching for blue?

I wish I could see the Lyon stools in person.  I'm not sure I want to take the chance ordering online again.  Ugh!  The Teen is just happy to have his ol' saddle stool back for now.

Hollie

Sunday, February 12, 2012

This was our Sunday evening

The Mr. and I were in the kitchen chatting and making dinner when we heard a strange dripping noise over in the living room.  The upstairs bathroom is above the living room, so I sent The Mr. upstairs to check it out.  He found the upstairs toilet overflowing and water all over the floor.

Not long after he and The Teen finished sopping up the water on the floor, water started streaming through one of the pot lights in our living room ceiling.  Luckily it just missed one of my club chairs, but it did soak the corner of our living room rug before we were able to grab a bowl to catch the water.

Turns out The Teen had flushed the toilet in his bathroom it 10-15 minutes earlier, but it clogged and the plunger in the tank didn't release, so the water kept flowing.  What a way to close out a weekend.  Wah-wah.

We had a friend recommend a local restoration company, so I called and arranged for them to come over right away.  In the meantime, water started seeping through the drywall on the living room ceiling.  The restoration team got here within the hour to check out the damage, take some moisture readings, and set up some fans.

A fan drying the carpet pad just outside "ground zero"

From this side, the fan reminds me of The Noo-Noo from Teletubbies

This loveliness is smack in the middle of our living room ceiling

Pepper the cat is checking out the two fans in our living room --
one pointing up to the ceiling, and one pointing down to dry the corner of the rug that got wet

The restoration team will be back Monday afternoon to take followup moisture readings and reassess next steps.  At a minimum, the ceiling will have to be repainted once it dries completely.

We're thankful it wasn't any worse, and especially that The Mr. and I were here when it happened.  Since The Teen pretty much only comes downstairs to eat, if he were home alone, the toilet could have overflowed for hours before he would have noticed!


I gave my mom the news this evening, and she reminded me that my freshman year of college, she was out of town when our pipes froze and burst.  I never saw any of the damage because I was away at school, but it was my room that got flooded.  Luckily most of my stuff was with me, rather than back in my room.

Have you ever had to deal with water damage?

Hollie

Crushing on: Ceiling medallions as wall art

Do you remember seeing this photo in Better Homes & Gardens magazine several years ago?  I had clipped it and glued it in to my inspiration binder.  That was how things worked before the days of Pinterest, right?


I ran across it again on Joi's blog Nuestra Vida Dulce.  I met Joi last summer at our Mint Julep June Jaunt blogger meetup.  Joi was inspired by that same BHG image, and made it happen in her own living room.  Lovely, no?


Here are some other examples of ceiling medallions used as wall art.  Some are left in the primed state, like Joi's, and some have been painted.


Click on the photos for links to the sources.


I happen to have big blank wall in our master bedroom that is making the whole room feel awkward to me.  And I have visions of ceiling medallions dancing in my head!

Have you seen them used this way?  Would you take a chance on it in your own home?

Hollie
Newer Posts Older Posts Home